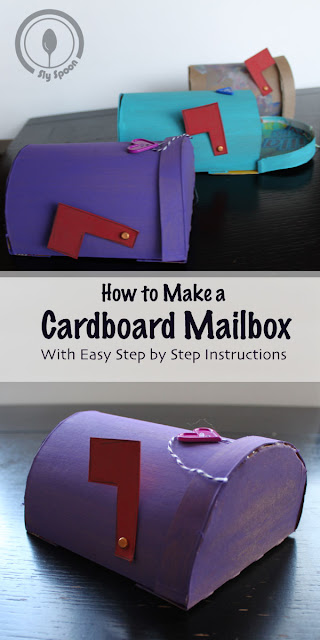
When I was young I remember every Valentine’s Day at my school we would create some kind of creative box for everyone to deliver Valentines too. I’m pretty sure that every single year of elementary school I made the same kind of a box, a mailbox. I loved it and I thought it was so fun to feel like I was getting letters delivered to my personal mailbox from all my classmates.
I was thinking that my son might also have a blast both writing and sending letters to the different members of our family, but because he’s a toddler I wanted to make our mailboxes out of something a little more durable than strait up paper.
So my cardboard creation for this month is a mailbox. I built three and then talked to my son about writing and sending letters. We wrote a letter to his grandma and put it the real mailbox, then we went home and he and I spent the rest of the afternoon writing and sending letters to each other via our cardboard mailboxes. They were a total hit. 🙂

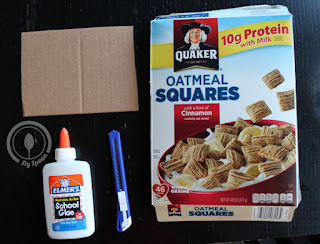
Supplies Needed For Each Cardboard Mail Box:
- 1 Piece of Thick Cardboard (Like From A Packing Box)
- 2 Pieces of Thin Cardboard (Like From a Cereal Box)
- Hot Glue (I have Elemer’s Glue pictured above, but don’t waste your time with that, it wasn’t strong enough)
- Brad
- String
- Button
- Paint
Set Up:
- Start by cutting a smallish rectangle from your thick cardboard the size you want your mail box to be.
- Take a piece of thin cardboard (like the front square of a cereal box) and bend it around your thick cardboard creating the main mailbox arch. Line the strait edge of the thin cardboard up against one side of your thick cardboard and leave an inch or so of extra cardboard off the back side. Once it’s positioned glue it to your thick cardboard piece.
- Cut small slits every inch along the extra cardboard that is hanging off your box and fold those pieces inward, creating an arch.
- Set your mailbox down on a piece of thin cardboard with the printed side of the cardboard against your mailbox. Trace around your mailboxes arch and cut out that cardboard leaving an extra inch along the bottom. Glue that cutout arch over the tabs you just bent down in the steps above and glue the extra tab to the bottom of your mailbox.
- Turn your mailbox around to the side that didn’t have excess cardboard hanging off of it and trace that arch on another piece of cardboard (with the printed side of the cardboard facing your mailbox). Remove your mailbox and make another arch an inch over the arch you just traced, double rainbow style. Cut out the cardboard leaving an inch or two extra at the bottom so you have something to use to secure it to your mail box.
- Cut small lines on the cardboard arch you just cut out going from the outer arch to the inner arch. Space each cut out an inch or so. When you’re finished bend in the sections you just cut so it creates a curve.
- Cut a thin strip of cardboard long enough to cover the curved part of your mailbox and glue it over the bent strips you just cut.
- Finish by gluing the bottom tap to the front of your mailbox.
- If you want a flag cut one out a piece of cardboard.
- Your mailbox structure is all in place at this point. Now it’s time for the details.
- Paint your mailbox and flag.
- Cut a small piece of string (our were about three inches long) and glue it inside the front flap of the mailbox right at the top.
- Glue a button to the top, middle, front of your mail box. Now you can close the mailbox by wrapping the string around the button.
- Add the flag to the side of your mailbox with a brad and you’re done.
Enjoy your personal mail delivery service.
Thanks for reading!
Have you tried to make a cardboard mailbox? I would love to see the mailbox you’ve created or hear about any of your experiences or thoughts to make it better in the comments section.
