This post may contain affiliate links. Read our disclosure policy.
How to Hand Sew a Simple Felt Stegosaurus: A Fun Craft for Kids!
I’m thrilled to share one of my favorite projects with you and your little ones—hand sewing a simple felt stegosaurus! As a mother of four who loves crafting, teaching my kids to create with their hands brings me so much joy. This project is perfect for beginners aged 6 (with adult supervision) and up and will introduce them to the basics of patterns and hand sewing.
Want More Felt Sewing Fun?
Find more beginner-friendly felt sewing projects and step-by-step videos on my YouTube channel, Sly Sew Simple. I post new patterns, easy tips, and fun crafts for kids and grown-ups alike!
» Subscribe & Explore More
What You’ll Need
- Felt (in your chosen color)
- Free Stegosaurus pattern (link below)
- Sharpie Creative Markers (or similar) for tracing
- Embroidery floss (try to match the colors to your felt)
- Needle with the big eye / Embroidery Needle (a child-friendly one works best)
- Scissors
- Stuffing (polyester filler, scrap felt, or even ripped-up plastic grocery bags)
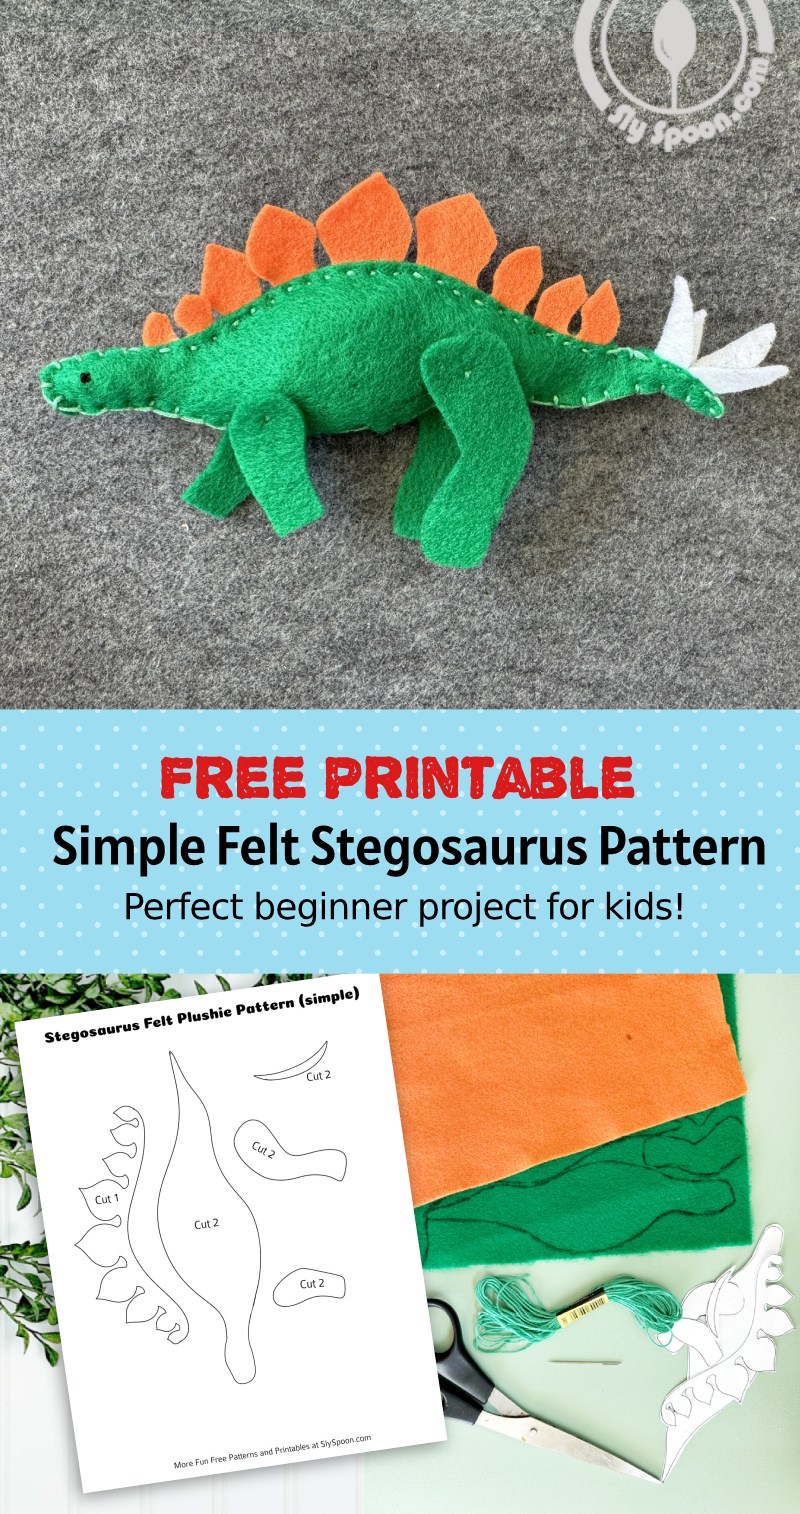
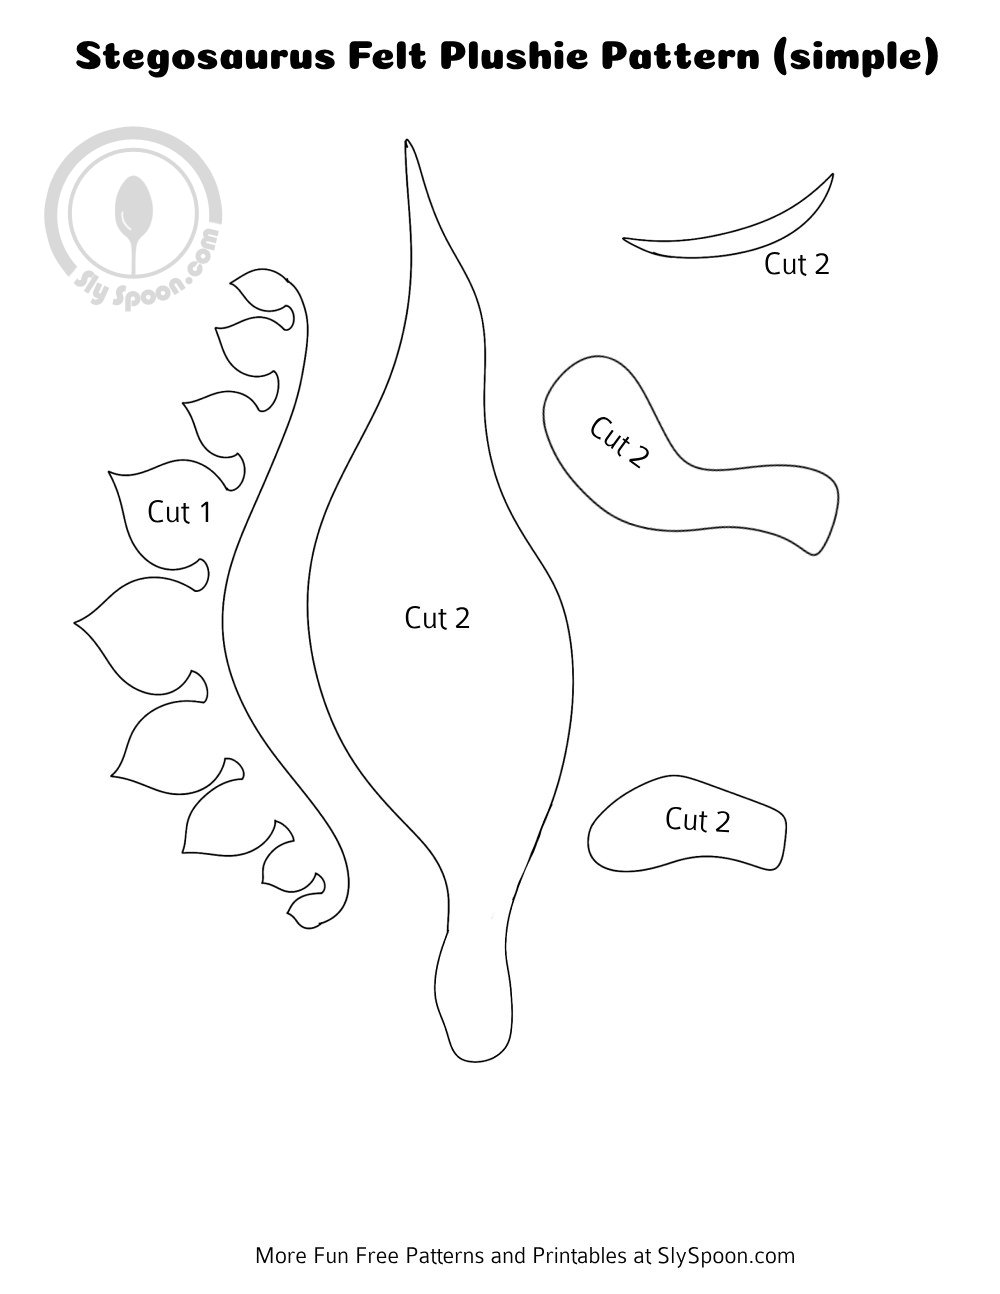
Download Your Free Stegosaurus Pattern
Before we dive in, be sure to download and print my free stegosaurus pattern!
You’ll need:
- Body (cut out twice and flipped so you trace the front and back of the pattern)
- Arms (cut out twice and flipped so you trace the front and back of the pattern))
- Legs (cut out twice and flipped so you trace the front and back of the pattern))
- Spines (cut out once)
- Tail spikes (cut out twice)
(Two pattern options below, one with an image of the finished project, one without)
Click Image to Download and Print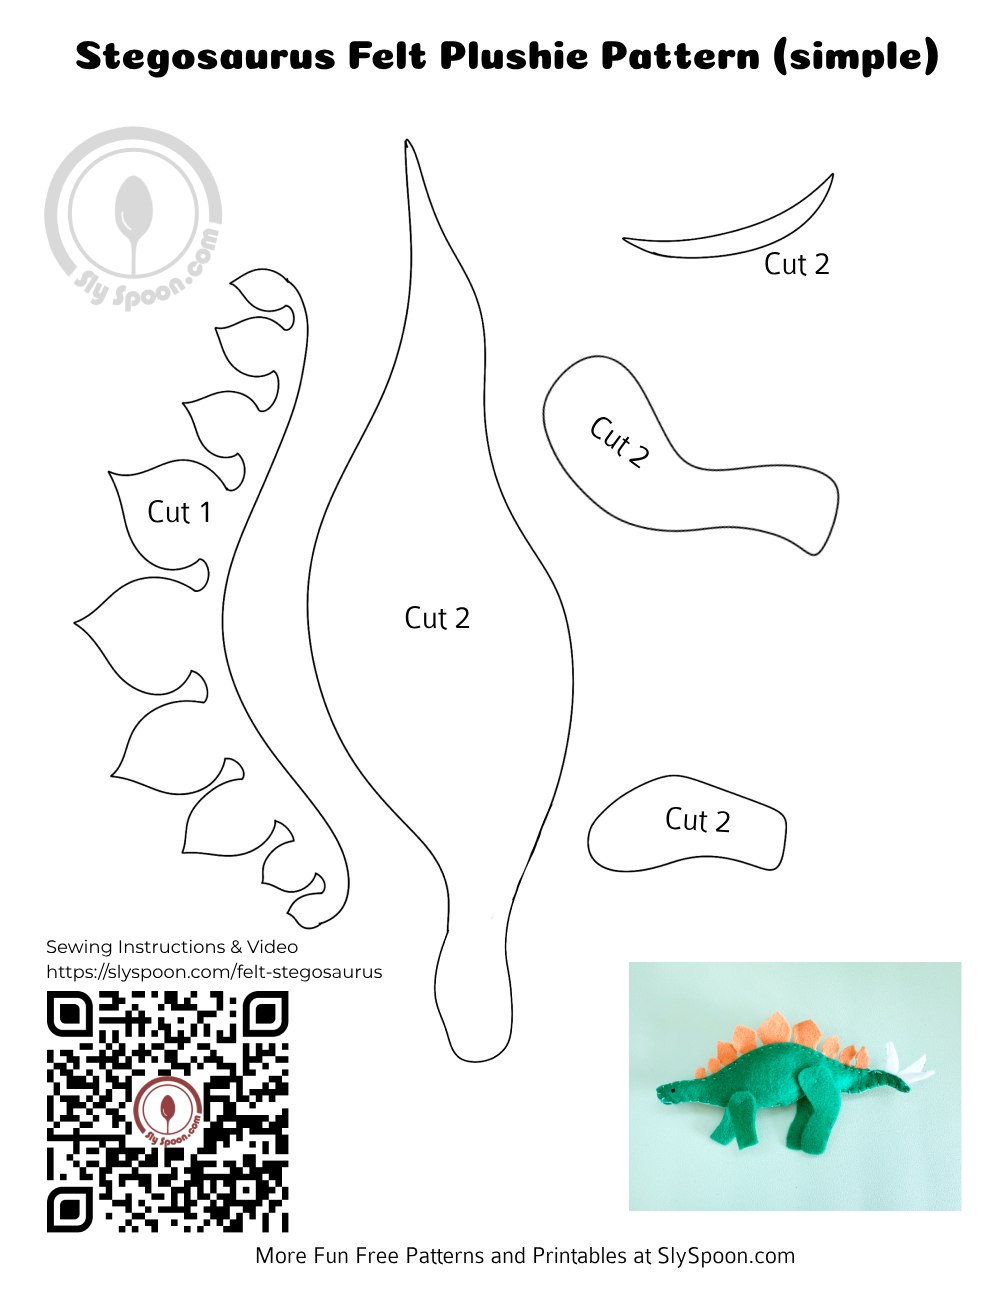
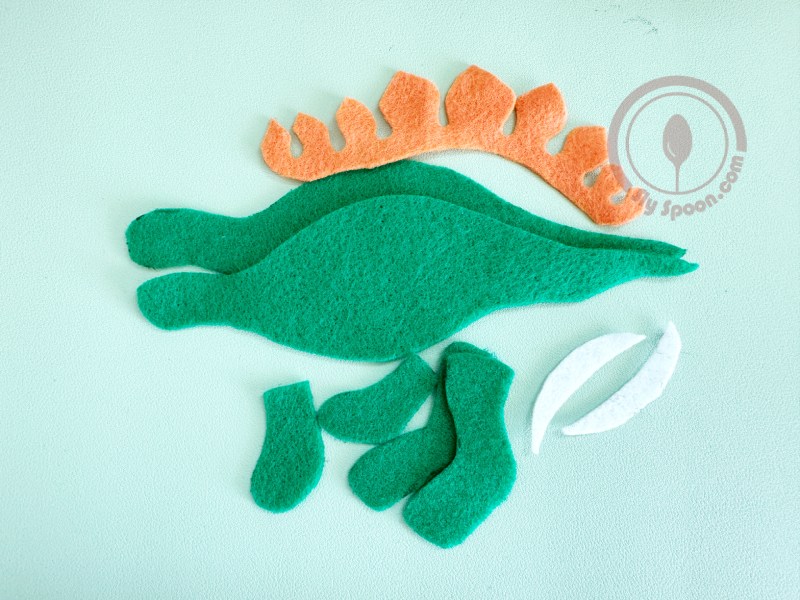
Step 1: Cut Out the Pieces
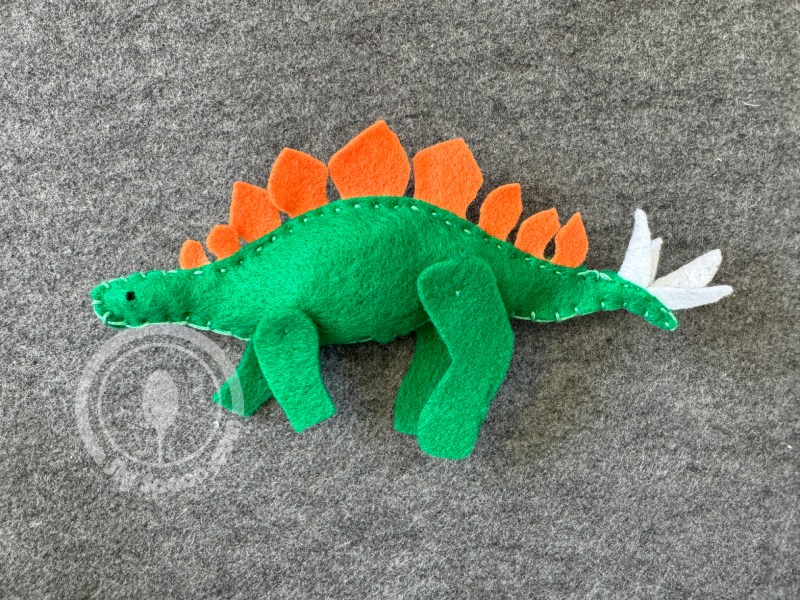
Start by tracing the pattern pieces onto your felt using a marker. The beauty of using a marker is that it stands out against the felt, making it easy to see while cutting! Remember to cut out the body, arms, legs, spines, and tail spikes as indicated. After cutting, make sure to either trim off any visible tracing lines or face them inward.

Step 2: Add the Eyes
Now, let’s add character to our stegosaurus! Take one of the body pieces and sew an eye onto it. Making a knot eye is simple: thread your needle and pass it through the felt to create a small knot, then pull it tight. This will be the eye of our friendly dino!
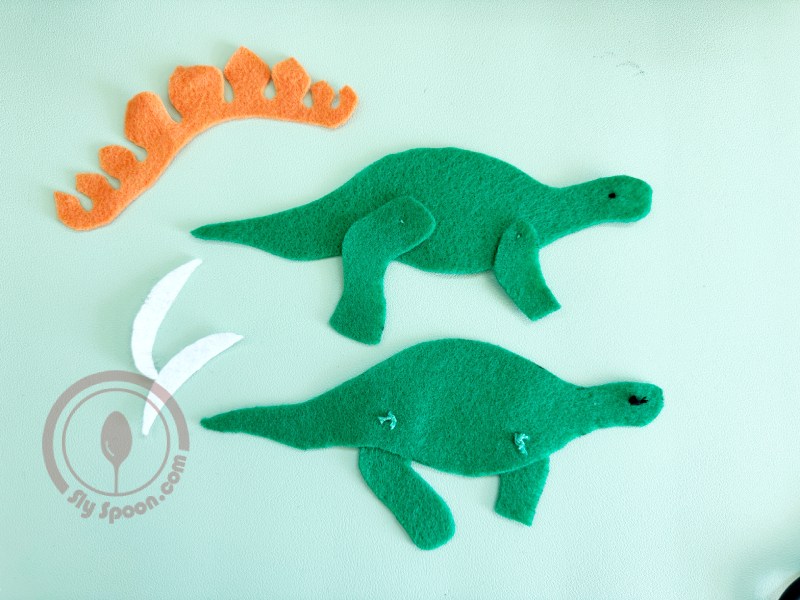
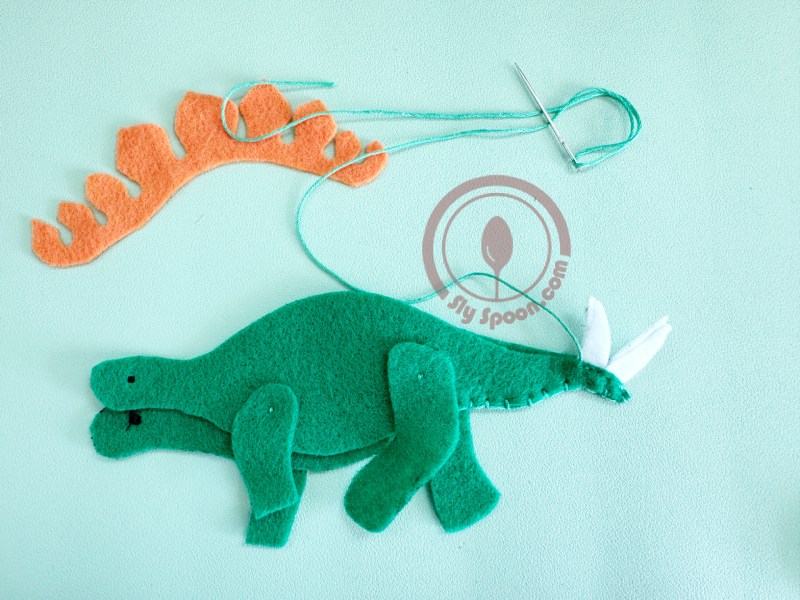
Step 3: Attach the Arms and Legs
Next, sew on the arm and leg pieces to each side of the stegosaurus’s body. Use a knot stitch, which you create by making a small knot in your thread before pushing your needle through the felt. This secures the pieces in place. Choose embroidery floss that matches your felt—it’s all about making it look snazzy!
Step 4: Sewing the Main Body
With the arms and legs attached, we’re ready to sew the main body! Start at the back leg, knotting your thread behind one of the legs. Then, use a blanket stitch around the bottom of the tail. A blanket stitch is made by sewing a loop around the edge, which creates a lovely finish!
Blanket Stitch: To make a blanket stitch, start by threading a needle with some sturdy thread and tying a knot at the end. Choose the edge of your fabric where you want to start stitching. Poke the needle up from the back of the fabric, so the knot is hidden. Pull it all the way through. Next, bring the needle back down into the fabric a little bit away from where you came up, then pull it through again. Before you pull the thread all the way tight, loop the thread around the edge of the fabric and bring the needle back through the felt. Keep repeating this process, making sure to keep the stitches evenly spaced and pulling the thread tight each time, until you reach the end of your stitching line.
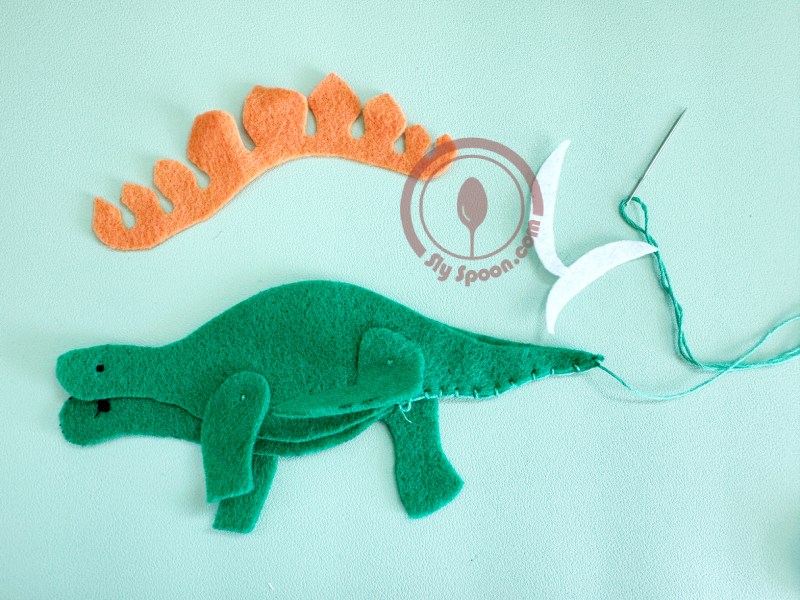
Step 5: Add the Tail Spikes
To attach the tail spikes, fold each one in half, giving you four spikes to work with. Use a running stitch (which is just sewing in and out in a straight line) to attach the spikes and the two halves of the body. After that, use another running stitch to secure the spines along the back.
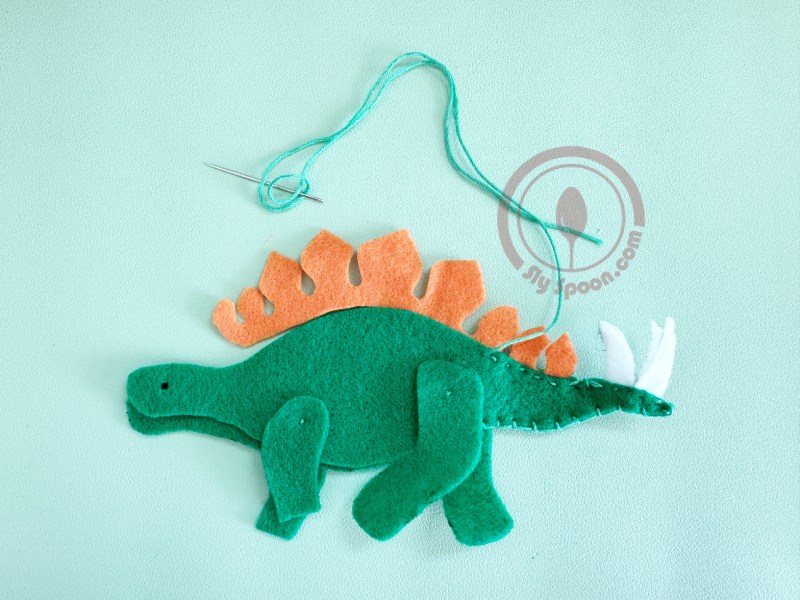
Step 6: Create the Face and Chest
Continue sewing with a blanket stitch around the face and chest, stopping right under the arm. This leaves us with a nice opening to stuff our stegosaurus!
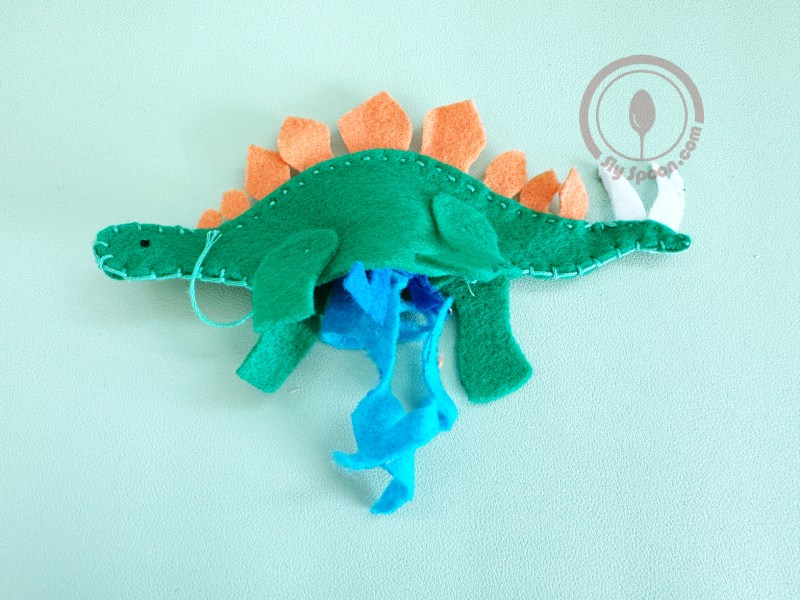
Step 7: Stuffing Time!
Here comes the fun part! Use poly filler, scrap felt, or even ripped up plastic grocery bags as stuffing. Start by filling in the tail and head with small amounts of filler—use the back of a pencil to help push it in if you need a little extra reach. Once those parts are nice and full, you can easily fill up the belly.
Step 8: Closing It Up
Finally, use a blanket stitch to close up the belly. Knot it off under the leg where you started, and there you have it—your very own felt stegosaurus!
I hope you and your kids enjoy this fun sewing project as much as my family does! It’s a fantastic way to introduce children to sewing while encouraging creativity and hand-eye coordination. Happy crafting! 🦖✂️