This post may contain affiliate links. Read our disclosure policy.
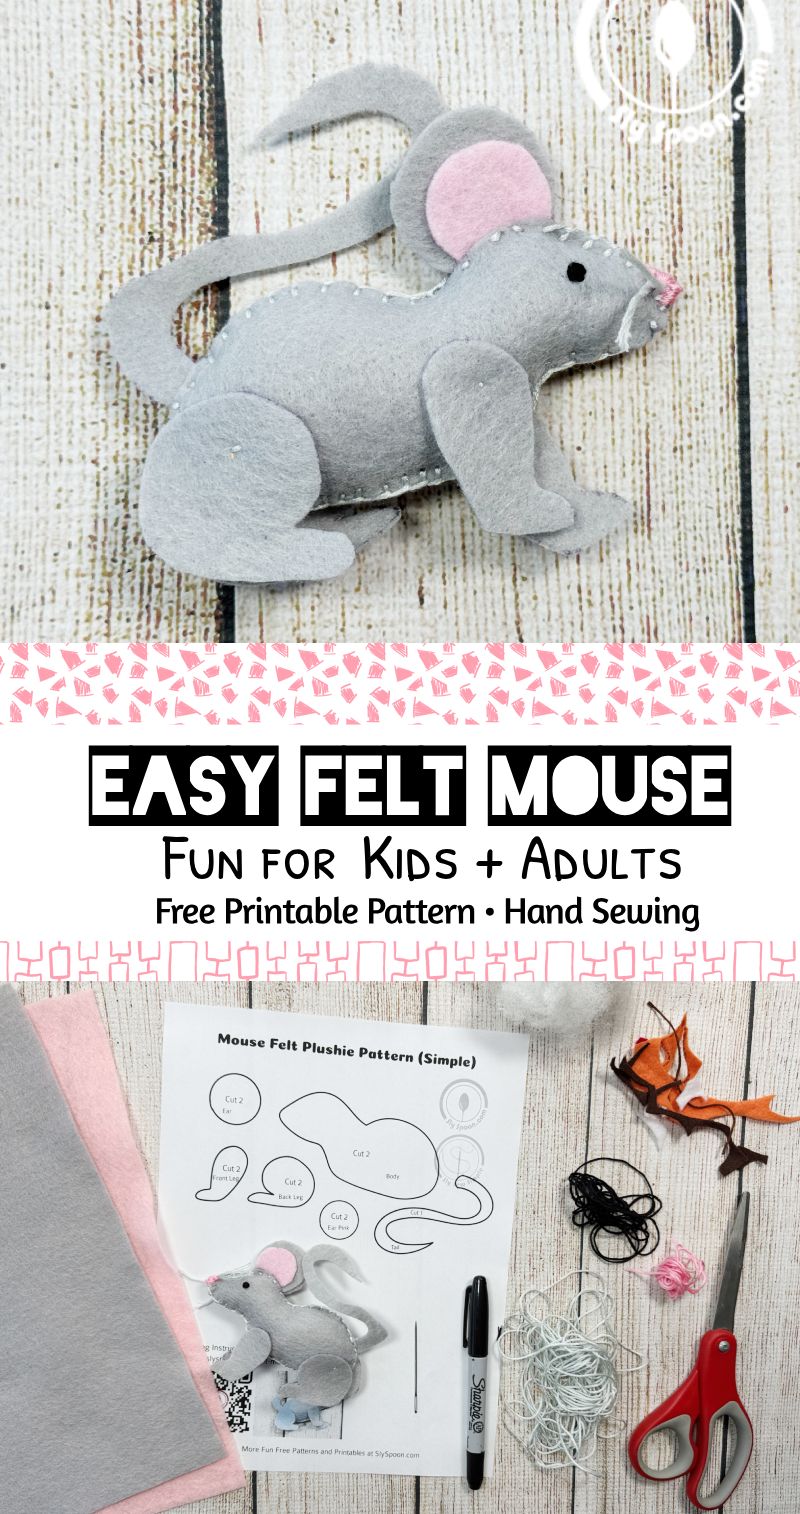

Looking for a fun and spooky sewing project this Halloween? Today I’m going to show you how to sew an adorable felt mouse (or rat!) plushie. This easy felt sewing pattern is beginner-friendly, making it a great choice for kids learning to sew as well as adults who want a relaxing, crafty project for the Halloween season.
These little felt mice are perfect for Halloween décor! Tuck them into a candy bowl, set them on your mantel with pumpkins, or make a few as a fun relaxing craft. They’re quick to sew, easy to customize, and a fun way to add a touch of handmade charm (and just a little spooky mischief) to your Halloween decorations.
Want More Felt Sewing Fun?
Find more beginner-friendly felt sewing projects and step-by-step videos on my YouTube channel, Sly Sew Simple. I post new patterns, easy tips, and fun crafts for kids and grown-ups alike!
» Subscribe & Explore More
What You’ll Need:
- Felt
- Free Mouse/Rat Pattern (download below)
- Markers (or similar) for tracing
- Embroidery floss (try to match the colors to your felt, and choose an eye and nose color)
- Needle with the big eye / Embroidery Needle
- Scissors
- Stuffing (polyester filler, scrap felt, or even ripped-up plastic grocery bags)
🖨️ Free Printable Felt Mouse/Rat Pattern – Click to Download and Print
 Click image to download and print
 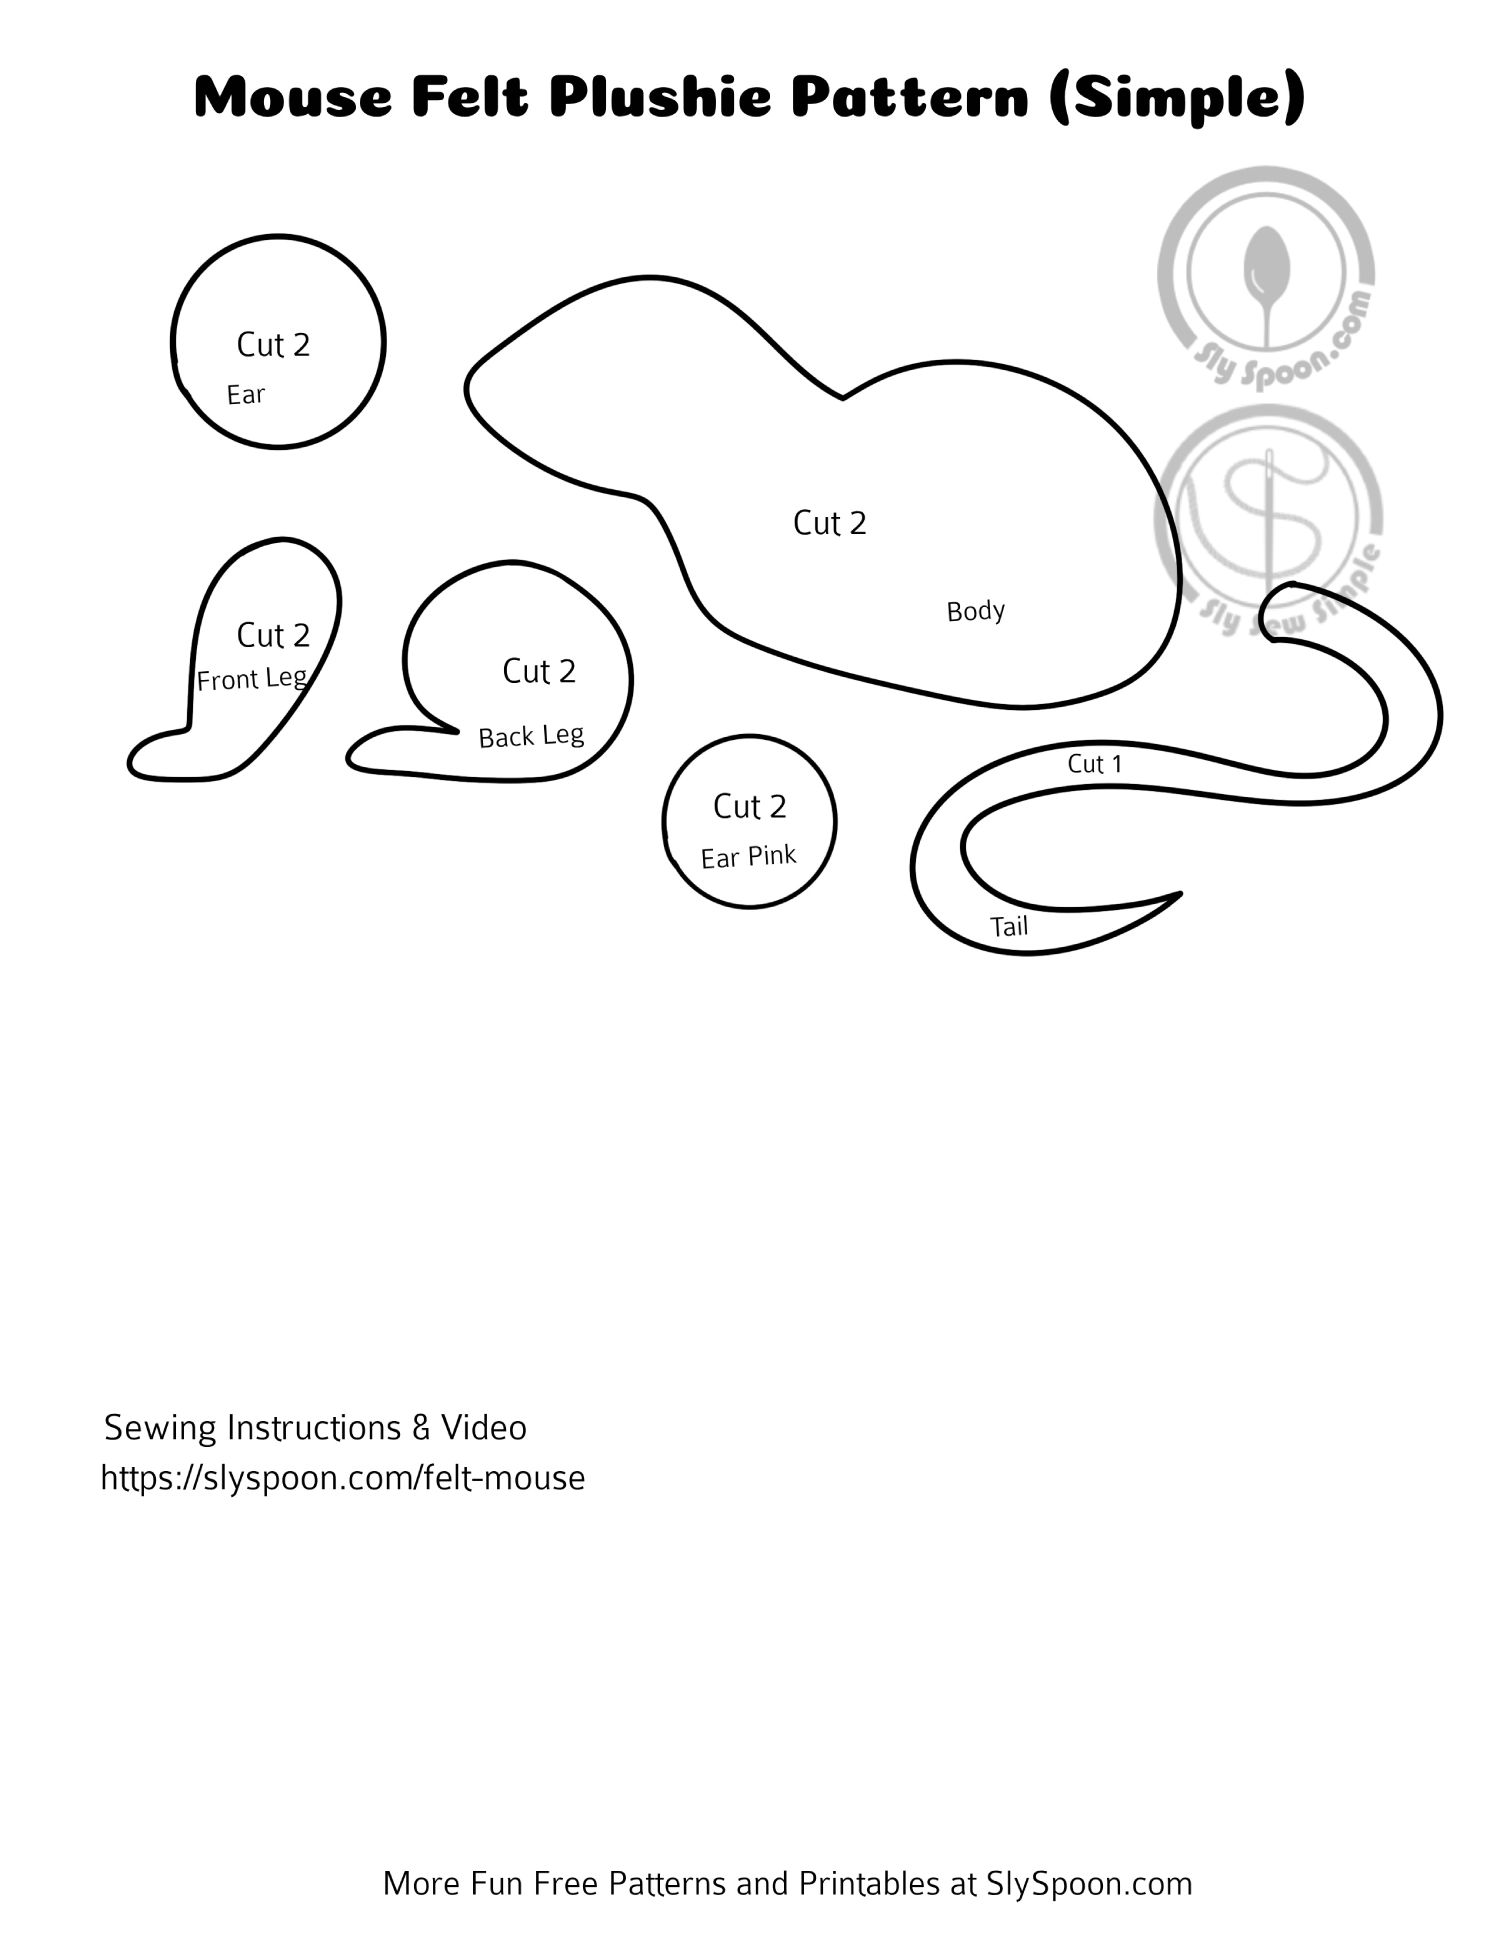 Click Image to Download and Print
Step 1: Trace and Cut
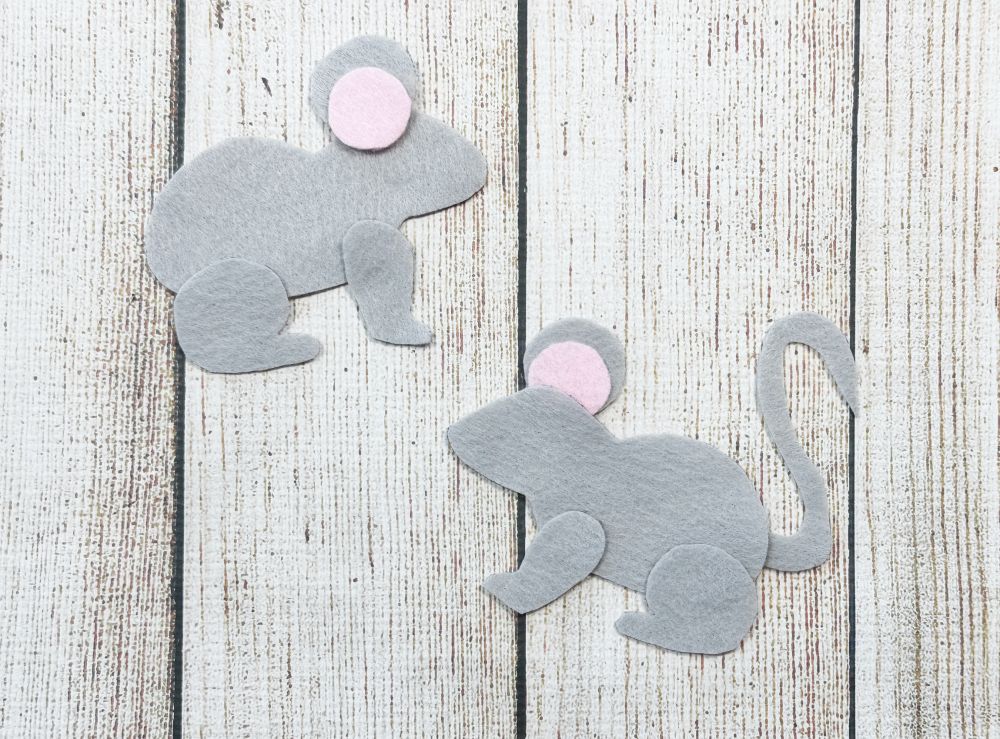
Place your pattern pieces on the felt and trace them. Trace any of the pattern piece with a 2 on both the front side (with the words) then flip it over and trace them on side without words for the 2nd trace, this will make them line up better when it comes time to sew. Cut out your pieces, doing your best to cut off any of your tracing lines. Sharp scissors work best for clean edges. Save your felt scraps for stuffing later!
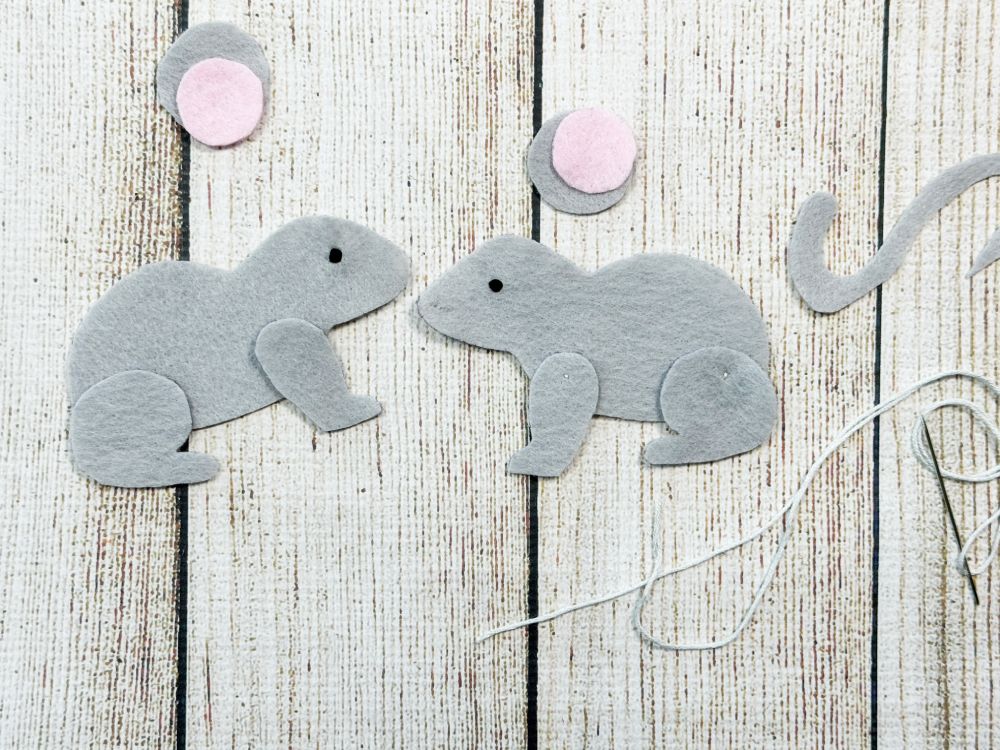
Step 2: Add Eyes
Sew tiny knot stitches for eyes, or use black beads for a little extra sparkle. (Want to make them extra Halloween-y? Try red floss or sequins for a spooky effect!)
Stitch the Eyes: To sew on the eyes, start by knotting one end of your embroidery floss. Push the needle from the back of the mouse’s body to the front where you want the eye. Secure it with a “knot stitch” by pulling the thread tight and tying a small knot. If you prefer larger eyes, you can stitch a few more times—three stitches usually do the trick. Repeat for the second eye, ensuring that the knots are hidden inside the mouse.

Step 3: Attach the Feet
Position the front and back legs on the mouse body sew them in place with a single knot stitch (like you did for the eye). Make sure any visible tracing lines are facing inward, and position the back feet so the back side is touching the mouse’s bum (if they’re sewn to far forward you get a mouse with a slightly odd looking backside) Don’t worry if your stitches aren’t perfect—this project is all about practice and fun.
Step 4: Sew the Body
Start stitching the two body pieces together with a blanket stitch. I usually start under the back feet so I can hide my starting stitch, then and work my way around the mouse, pausing when I reach where I want to attach the tail.
How to Blanket Stitch: To create a blanket stitch, insert your needle through both pieces of fabric and pause before pulling it all the way through. Pull the thread end (from your last stitch) around the top of your needle, then pull the needle fully through the fabric. Move down your felt slightly, poke the needle back through on the same side as your previous stitch, and again loop the tail end of the thread over the top of the needle before pulling it all the way out. Keep repeating this process, ensuring your stitches are evenly spaced and snug, until you reach the end of your stitching line.
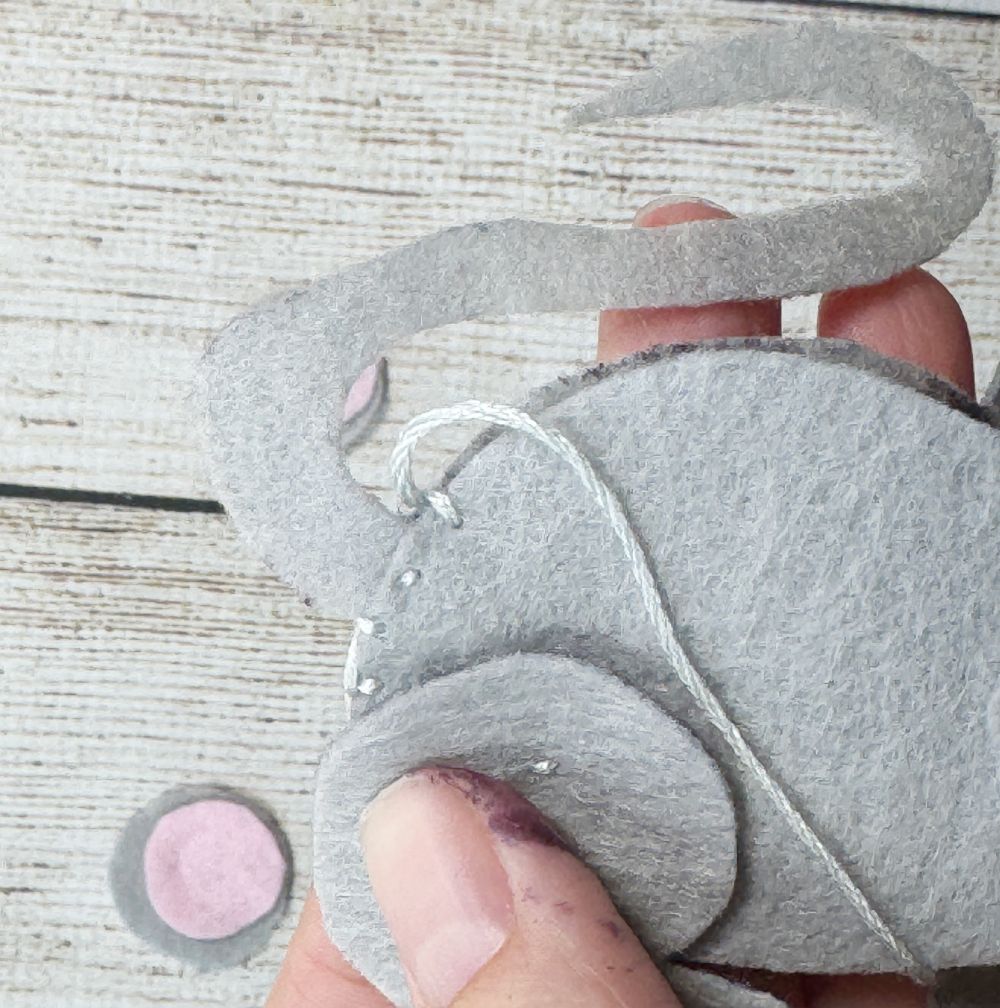
Step 5: Attach the Tail
Slip the tail piece between the two layers of felt, and decide if you want it facing up above the mouse’s body, or down around it’s feet. Secure it with a running stitch. Then continue with your blanket stitch around the curve of the body, pausing before you reach the head, so you can insert your ears.
How to Do a Running Stitch: Start by bringing your needle up through the fabric from the back to the front and pull it all the way through. Move the needle a little forward and push it back down through the fabric, leaving a small gap. Pull the thread tight. Then, bring the needle back up through the same spot where it just came down, creating a small stitch. Continue this back-and-forth motion, moving slightly forward each time until you reach the desired end point of your stitching.


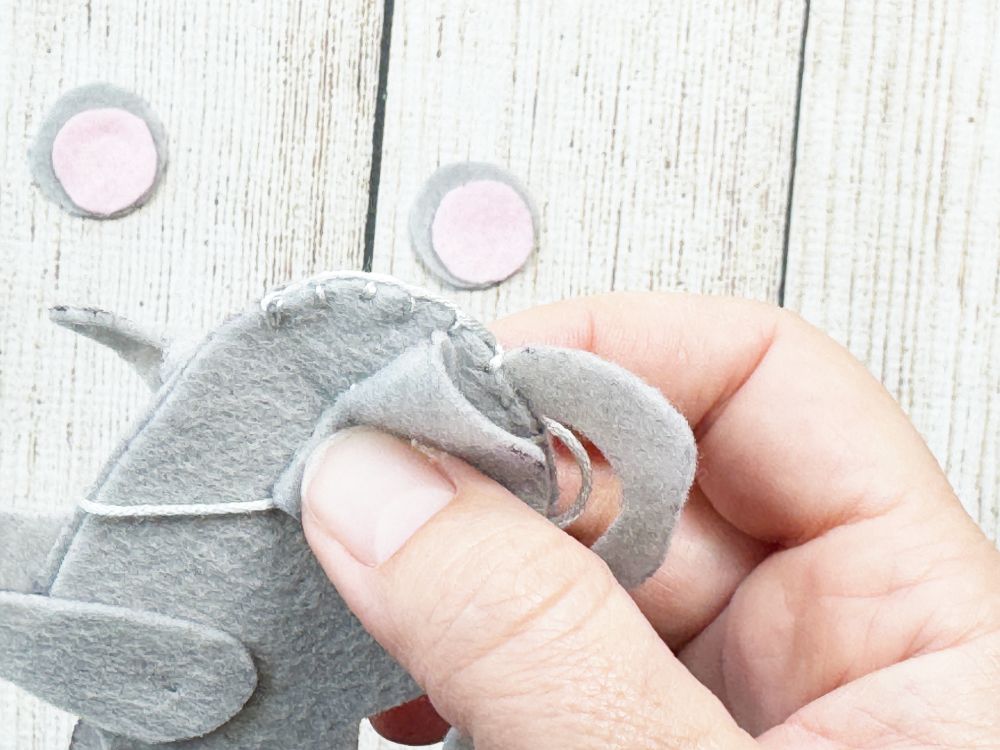
Step 6: Add your Ears
Slip the four ear pieces between the two layers of mouse body felt, with the pink circles on the outside and the gray circles on the inside, touching each other. Secure them to the mouse body with a running stitch, going slow and making sure that you’re sewing through all 6 pieces of felt. Then continue with your blanket stitch around the face, pausing when you reach the front legs so you can stuff your mouse.

Step 7: Stuff and Close
Fill your mouse with stuffing until it’s plump but not too tight. Stitch the opening closed neatly with a blanket stitch, and do a knot stitch in the end over the top of your starting stitch.
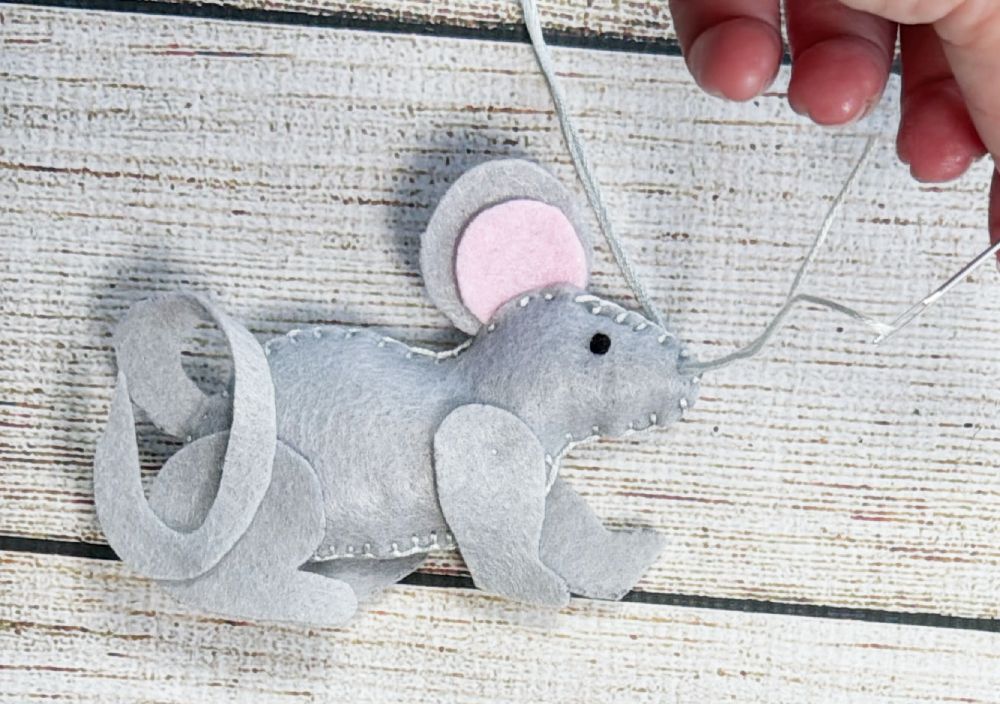
Step 8: Add Whiskers and a Nose
Use light colored gray or white embroidery floss, and pull two lines of threat through your mouse near the nose. Tie them together across the nose so they don’t slide out, and cut them long to make whiskers. Then stitch a tiny nose at the tip of the face, over the knot of the whiskers. A pink or red nose also makes it extra cute—or spooky!
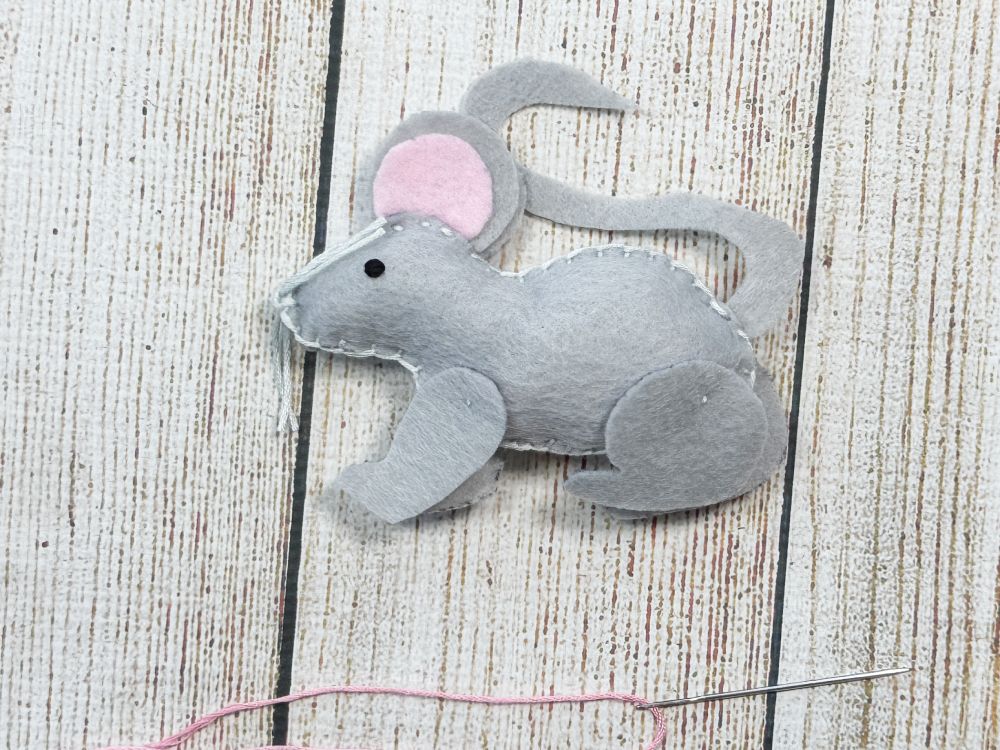
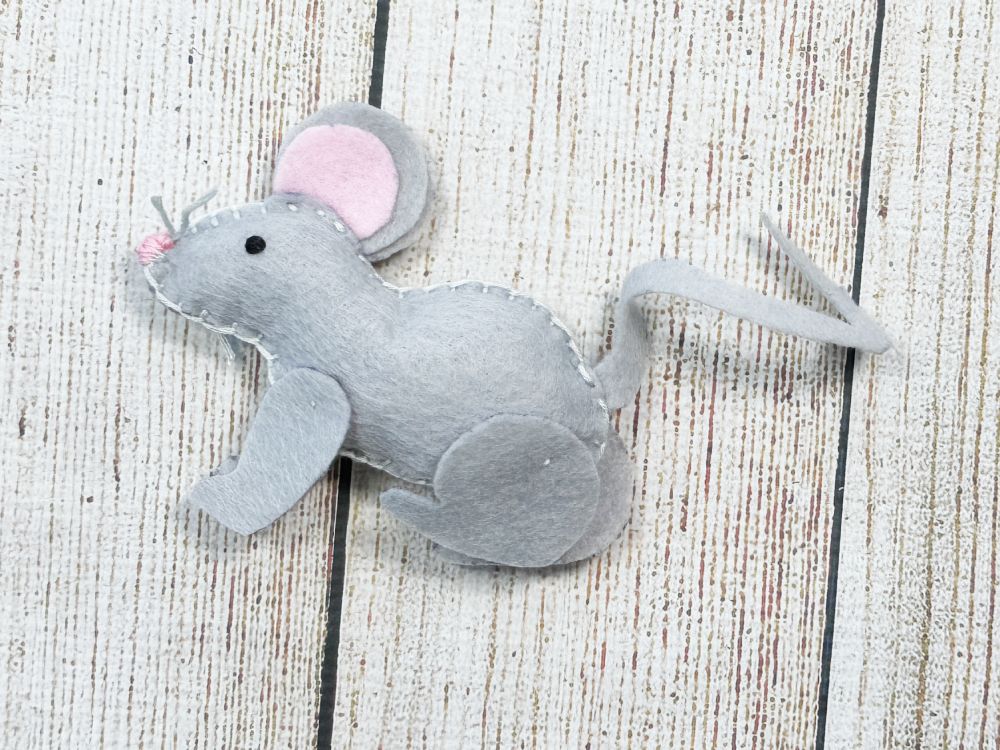
🎉 You’re Done! You now have a handmade felt mouse (or rat) plushie that’s perfect for Halloween.
These little mice can be made in just 30–60 minutes, so they’re great for last-minute Halloween crafting. Make a few in black felt for spooky Halloween décor, or use gray and white for a more traditional look. You can scatter them around your Halloween party setup or let kids proudly display them with pumpkins and bats.
Why You’ll Love This Project
- Beginner-Friendly: Great for kids (with help) and adults learning hand sewing.
- Quick Craft: Finish one in under an hour.
- Halloween Ready: Perfect as spooky décor, or handmade party activities and favors.
- Free Pattern Included: Just print, cut, and sew.
