This post may contain affiliate links. Read our disclosure policy.

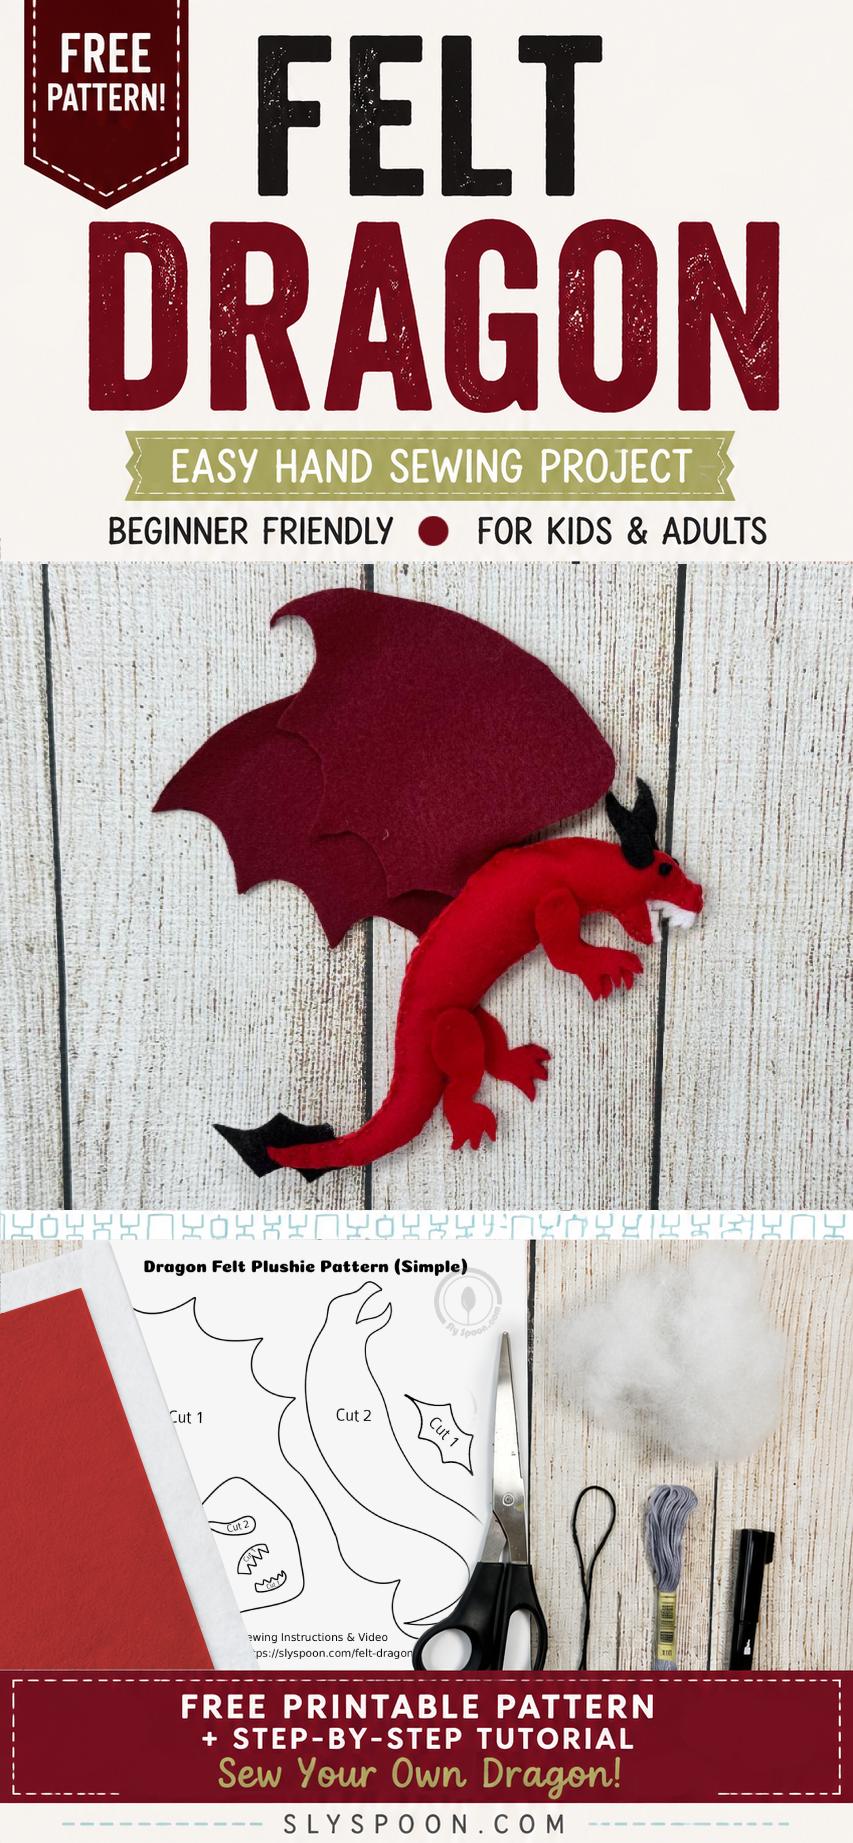
Looking for a magical hand-sewing project? This felt dragon sewing pattern is a great choice for beginners, older kids, and grown-ups. With a free printable pattern and simple hand stitches, you can sew your own felt dragon in any colors you want.
Make a fiery red dragon, a deep blue water dragon, a green or brown earth dragon, an icy white dragon, or invent an entirely new magical creature. Change the colors of the body, wings, horns, teeth, and tail to make every dragon unique.
Sew Your Own Felt Dragon
Today, we’re going to sew a felt dragon plushie by hand.
This project works well for older children with adult supervision, but it is also a relaxing and creative sewing project for adults. The smaller pieces require a little patience, but the basic construction uses beginner-friendly hand stitches.
Want More Felt Sewing Fun?
Find more beginner-friendly felt sewing projects, free patterns, and step-by-step videos on my YouTube channel,
Sly Sew Simple where I share simple hand-sewing tutorials designed for beginners. » Subscribe & Explore More
Choose Your Dragon’s Element
One of my favorite parts of this pattern is choosing what kind of dragon to create. You can copy the red dragon shown in this tutorial or use the pattern as a starting point for your own fantasy creature.
- Fire Dragon: Use red, orange, burgundy, black, or gold felt.
- Water Dragon: Try blue, aqua, turquoise, silver, or sea-green felt.
- Earth Dragon: Combine green, brown, tan, moss, or rust-colored felt.
- Ice Dragon: Use white, pale blue, lavender, gray, or sparkly silver felt.
- Storm Dragon: Try charcoal gray, black, navy, or purple with silver details.
- Forest Dragon: Combine several shades of green with brown wings and horns.
- Rainbow Dragon: Give the body, wings, spikes, and tail different bright colors.
You can also add extra felt spots, embroidered scales, contrasting claws, or decorative stitching. There is no wrong way to design a magical dragon.
What You’ll Need
- Felt in your chosen dragon colors
- Free felt dragon pattern (download link below)
- Markers or another tracing tool
- Embroidery floss in colors that coordinate with your felt
- Large-eye needle or embroidery needle
- Sharp scissors
- Stuffing such as polyester fiberfill, scrap felt, or another soft filler
- Optional black bead or small piece of black felt for the eye (I just use thread)
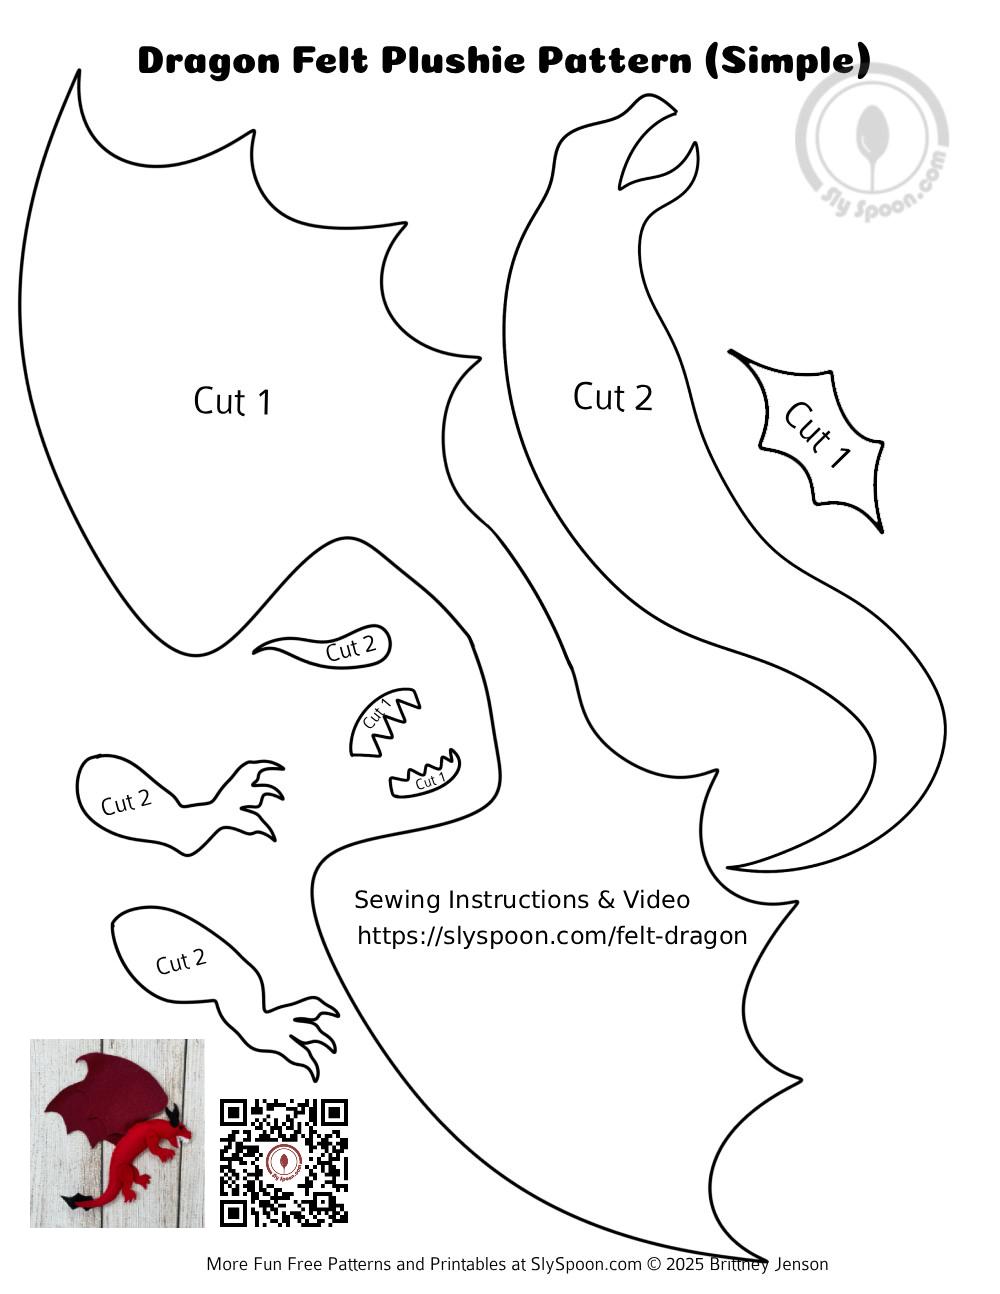
Download the Free Felt Dragon Pattern
Print the pattern at 100% or actual size unless you intentionally want to make a larger or smaller dragon. Check your printer settings to make sure the page is not automatically being shrunk.
New to Felt Sewing? 🧵
Get my FREE Beginner Felt Sewing Starter Pack! It includes 5 super-simple felt projects designed for kids and first-time sewists, plus printable patterns and easy stitch instructions.
Simple shapes, minimal pieces, and easy stitches help beginners finish a project without getting overwhelmed!
Step 1: Print, Trace, and Cut the Pattern Pieces
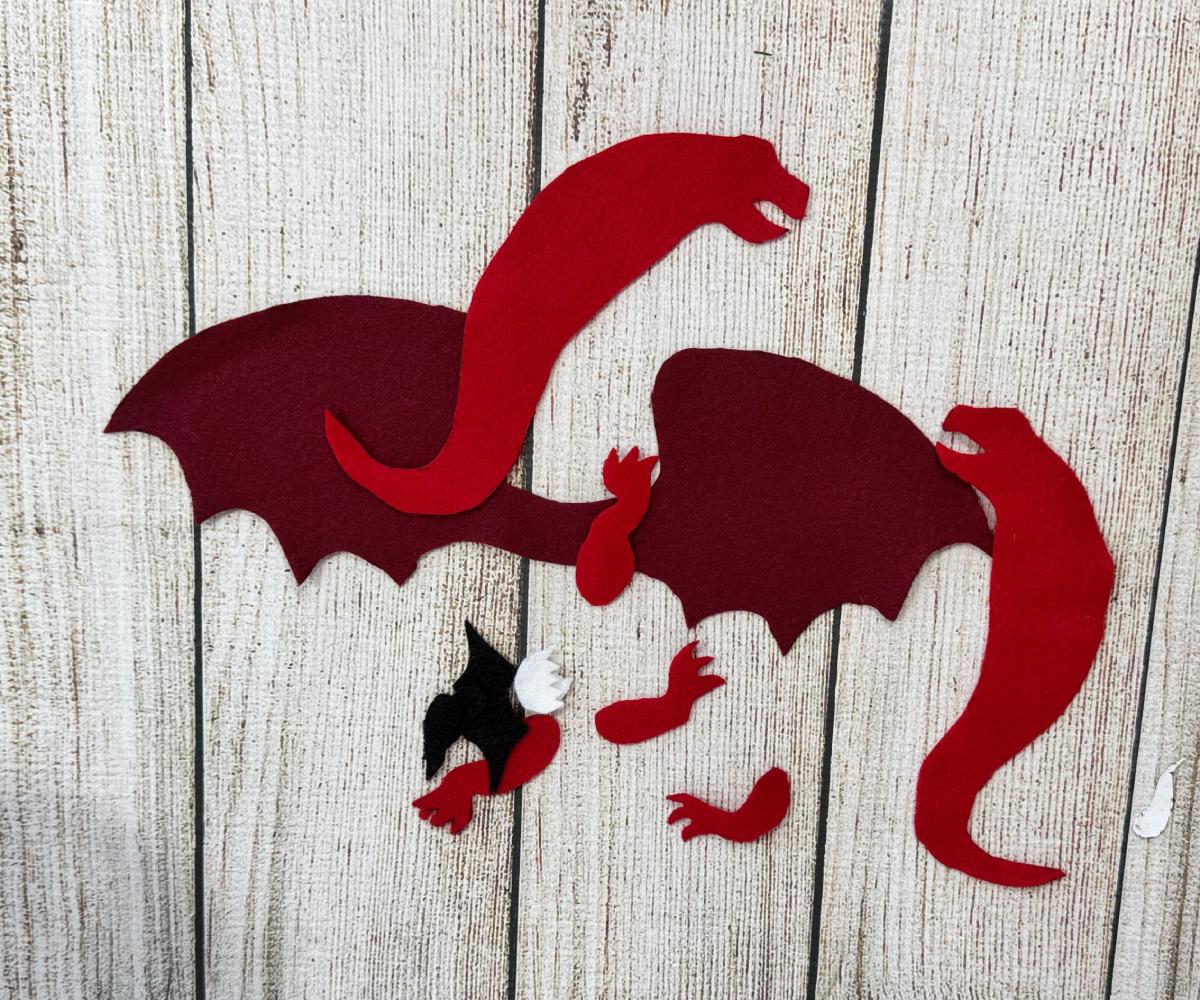
Print the dragon pattern and cut out the pieces. Put the cut pieces on your selected felt colors and trace around them with a marker.
Carefully cut out the felt pieces. Remember to flip the paper template and trace on the side with words and on the back side, without words, on any of them that say “cut 2” so the body pieces will match up when sewing.
Trim away any visible marker lines so the finished edges look clean.
Tip: Save your larger felt scraps. They can be cut into small pieces and used as stuffing.
Step 2: Attach the Legs and Horns to the Body Pieces
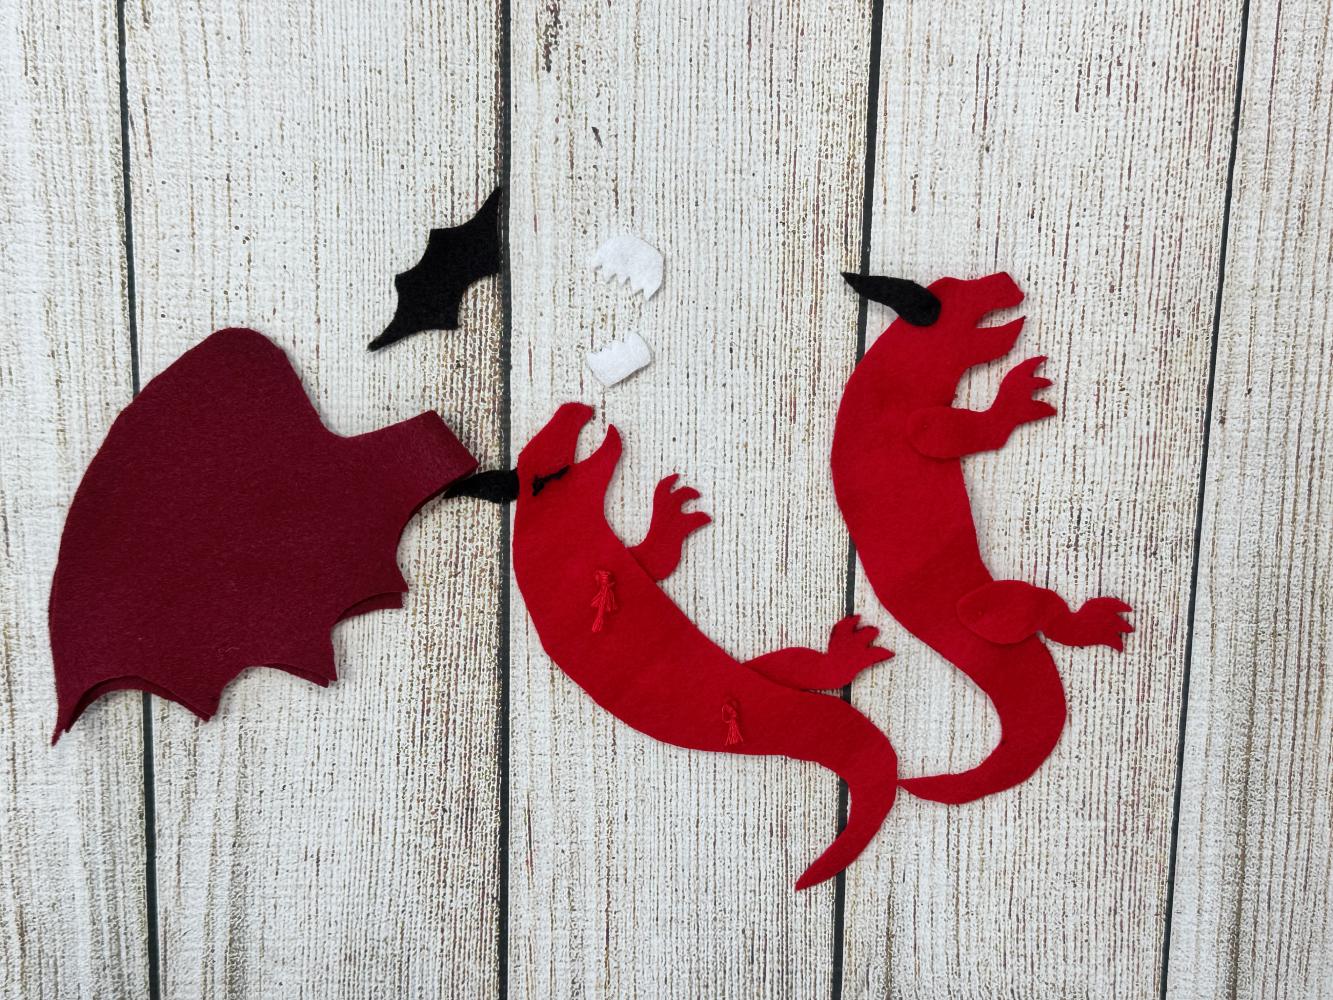
Position the front and back legs on the outside of each dragon body piece. Check the direction of the feet before sewing so the legs point the way you want them to on the finished dragon.
Use knot stitches to sew them in place with a single knot stitch on the top of each leg portion.
How to Make a Knot Stitch
- Thread your needle and tie a knot in the end of the embroidery floss.
- Bring the needle up through the felt where you want the stitch.
- Push the needle back down very close to where it came up and gently pull it through.
- Pull the thread tight until a small raised knot forms on the surface of the felt.
- Tie off your thread in back of your project
Tip: If your knot pulls through the felt, repeat the steps but try to put your needle back through your felt further away from where you came up in the felt.
Step 3: Add the Eyes
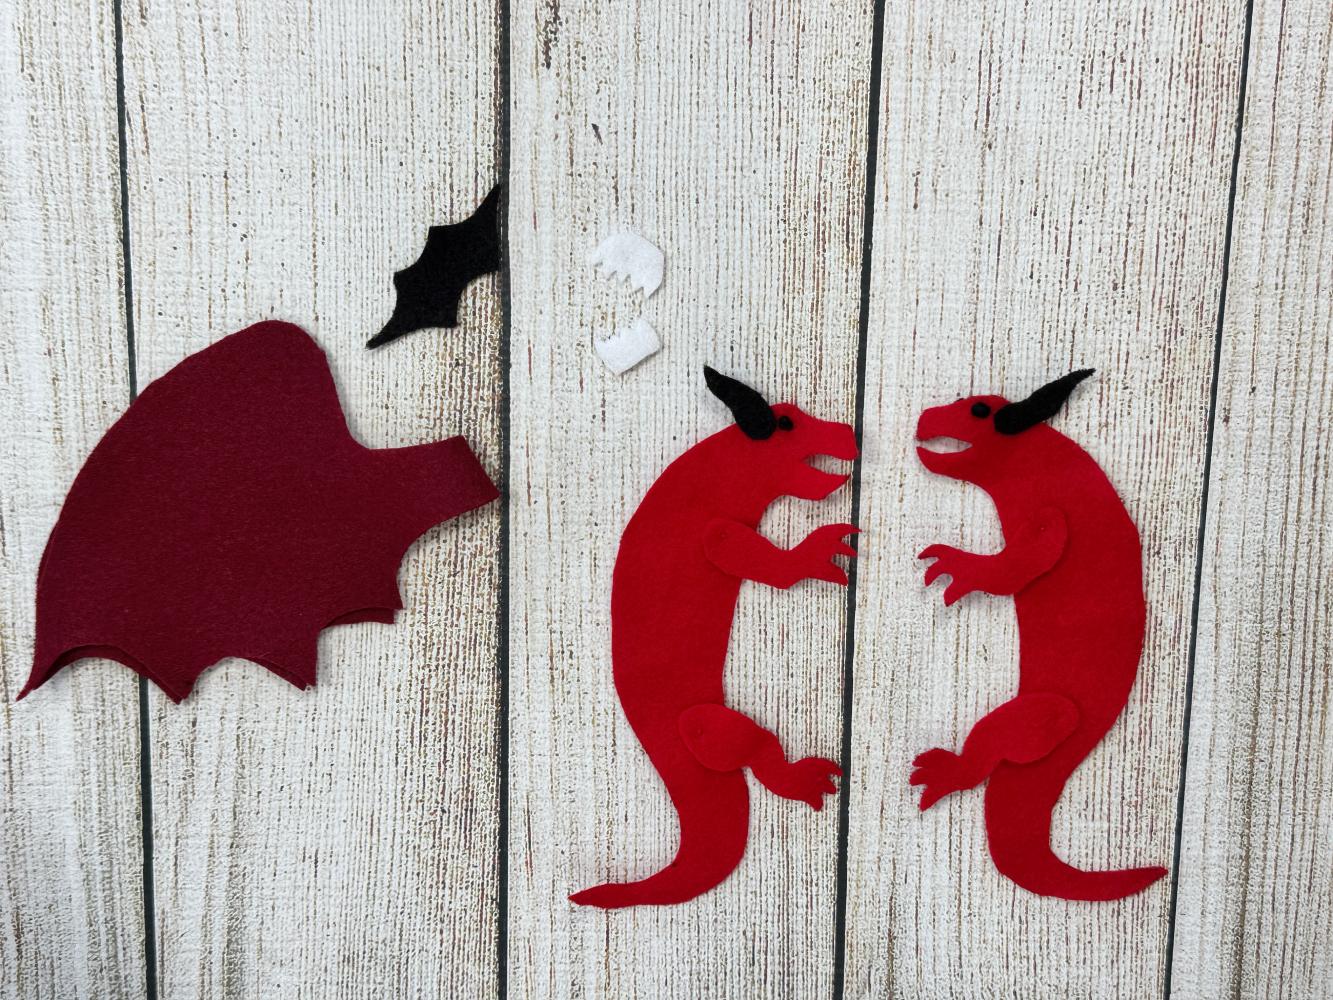
Add the eye before sewing the two body layers together. You can use a small black bead, a tiny circle of black felt, or sew a french knot and add them with embroidery floss.
Option 1: Embroidered Eye
- Thread your needle and tie a knot in the end of the embroidery floss.
- Bring the needle up through the felt where you want the stitch.
- Wrap the thread around the needle 2–3 times.
- Hold the wrapped thread snug against the felt with your finger.
- Push the needle back down very close to where it came up and gently pull it through.
- Pull the thread tight until a small raised knot forms on the surface of the felt.
Option 2: Bead Eye
- Position a small black bead on the dragon’s face.
- Bring the needle up through the felt and through the bead.
- Pass the needle through the bead several times to secure it.
- Tie the floss securely on the back of the felt.
You may also embroider nostrils, eyebrows, scales, or a curved mouth at this stage.
Step 4: Position the Wings, Tail Spikes and Teeth
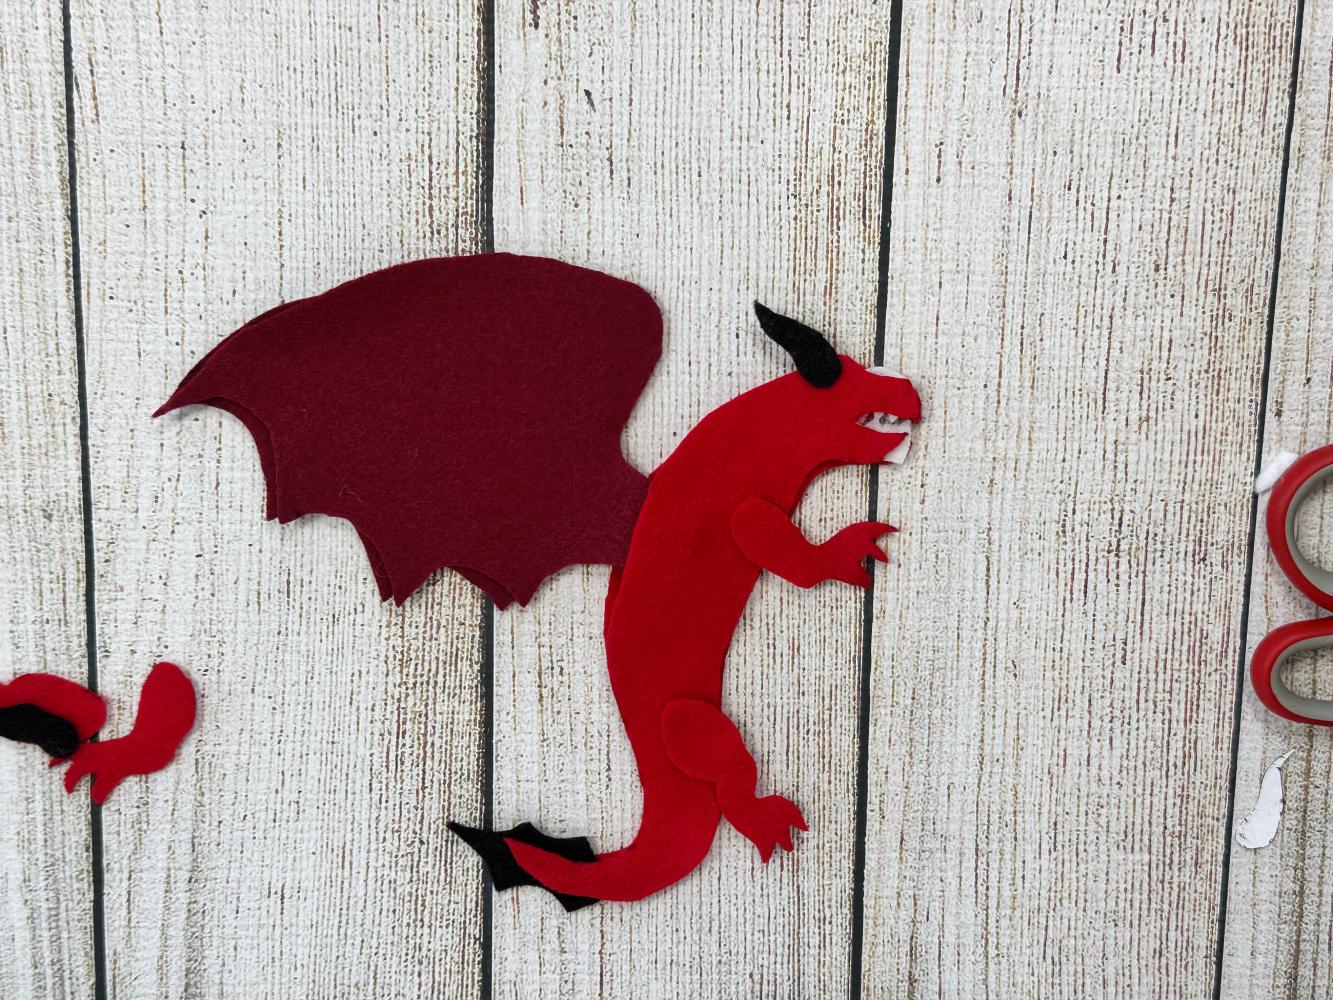
Fold the wings in half and place them between the two body pieces on the dragon’s back.
Position the white felt teeth along the inside of the dragon’s open mouth, and add the tail spike between the two body pieces of the tail.
Step 5: Begin Sewing the Dragon’s Body
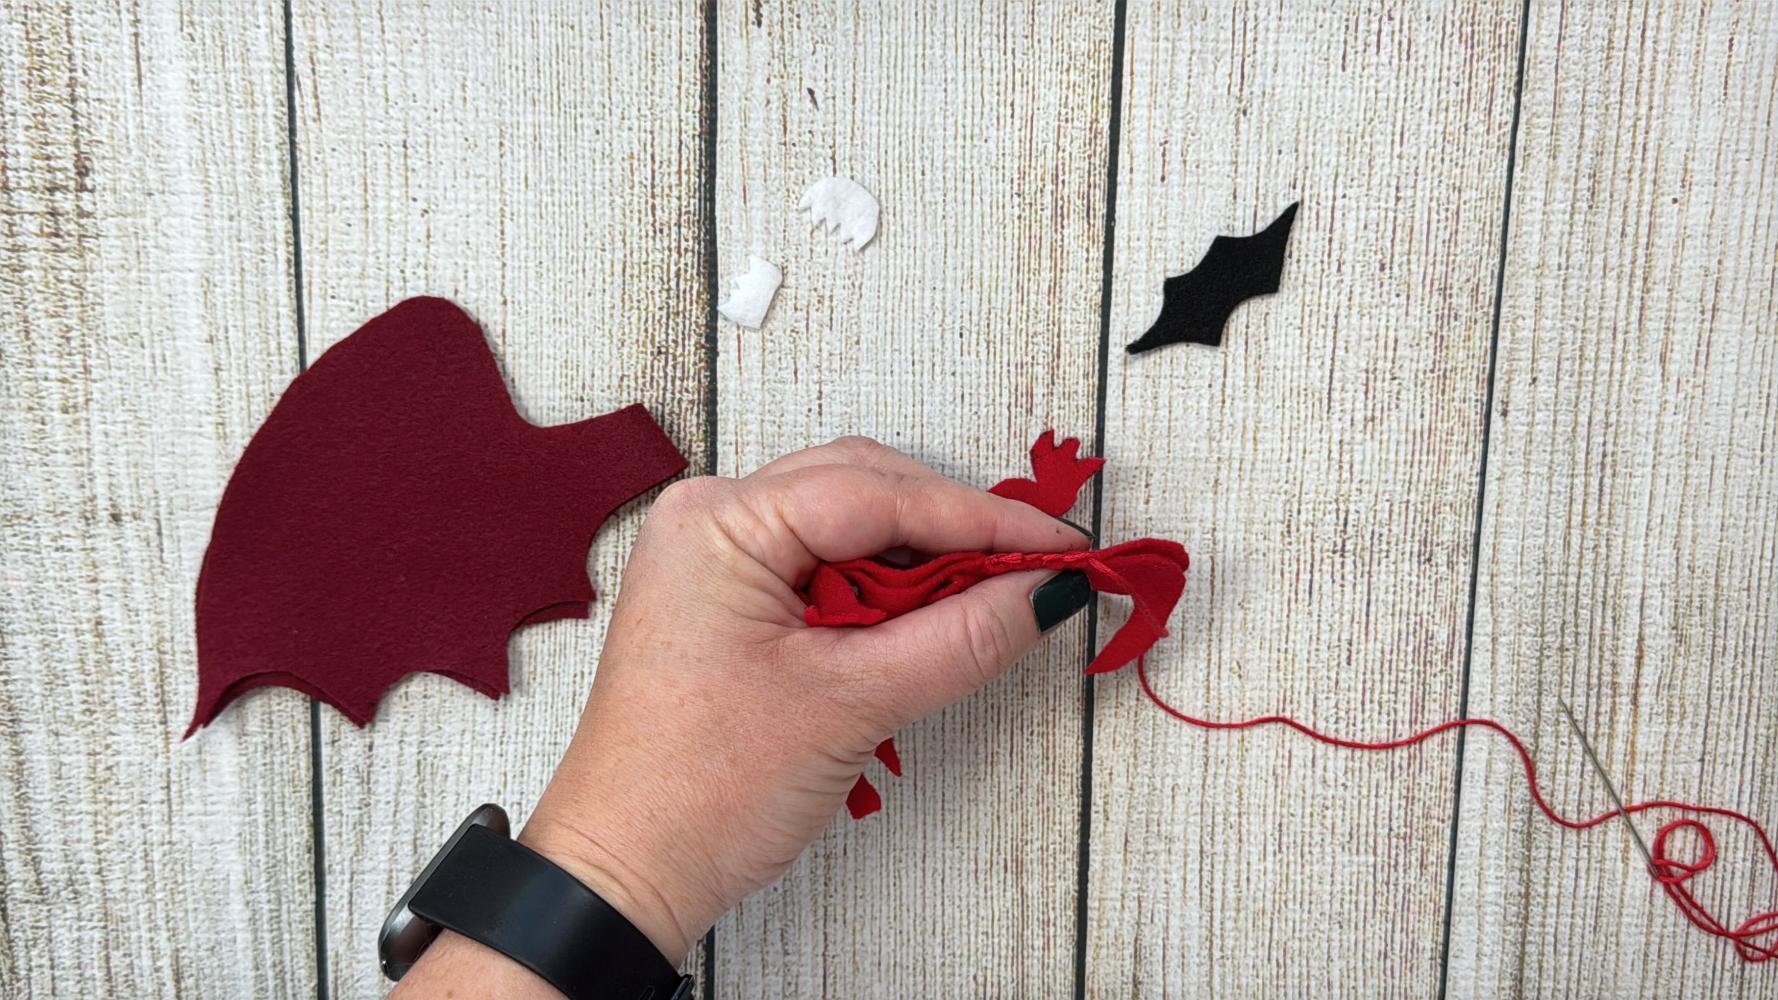
Place the two body pieces together with the decorative sides facing outward. Line up the edges as evenly as possible. Starting behind the back legs use a knot stitch to start your thread, then use blanket stitch when sewing the body of the dragon to the body of the dragon, and a running stitch when you are sewing in the tail spikes, wings and teeth.
Stop sewing when you reach the front legs so you can add felt scraps or poly fill to your creation.
Take your time around the dragon’s mouth, legs, and curved neck. Smaller stitches can make it easier to follow tight curves.

How to Make a Blanket Stitch
- Bring the needle up through both layers of felt near the edge.
- Before pulling the thread tight, loop the thread behind the needle.
- Pull the thread snug to create a neat stitch along the edge.
- Move a short distance forward and repeat the same steps.
- Keep your stitches evenly spaced until you reach the end.
- Tie a knot on the back to finish.
Tip: Try to keep each stitch about the same distance from the edge for a clean, even border.
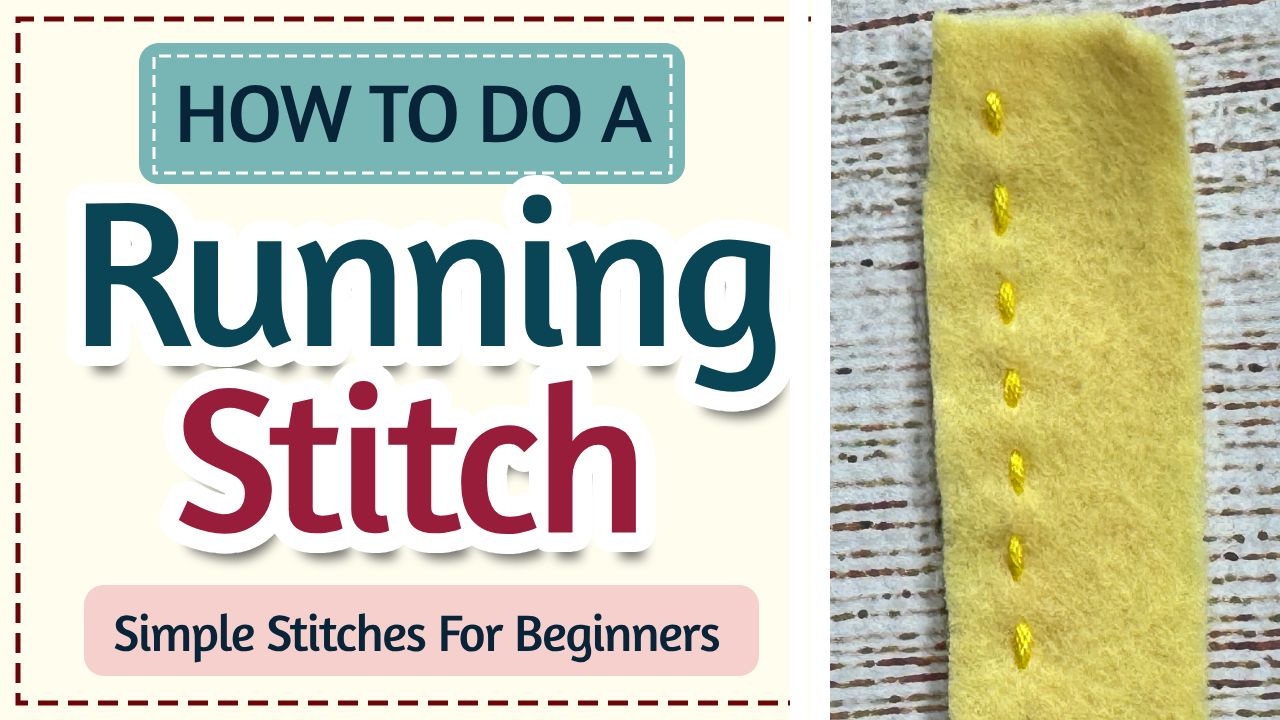
How to Make a Running Stitch
- Bring the needle up through the felt from the back.
- Push the needle back down a short distance away to make a small stitch.
- Bring the needle up again a short distance ahead.
- Repeat, making evenly spaced stitches across the felt.
- Tie a knot on the back to finish.
Tip: Smaller, evenly spaced stitches create stronger seams and a neater finished project.
Step 6: Stuff the Dragon
Leave an opening several inches wide along the lower body. Add small pieces of stuffing through the opening.
Begin by pushing stuffing into the dragon’s head, snout, neck, and tail. A pencil, chopstick, or the blunt end of a marker can help move stuffing into narrow spaces.
Continue adding stuffing until the dragon feels softly rounded but not overly firm. Too much stuffing can stretch the stitches and distort the smaller details.
You can also use small pieces of scrap felt as stuffing, although polyester fiberfill generally creates the smoothest finish.
Step 7: Finish Sewing and Tie Off
After the dragon is evenly stuffed, close the remaining opening with blanket stitches.
When you reach your starting point, tie a secure knot. To hide the end of the floss, insert the needle back into the stuffed body and bring it out through a different area. Pull the thread gently, trim it close to the felt, and allow the cut end to disappear inside the dragon.
Step 8: Add Final Dragon Details
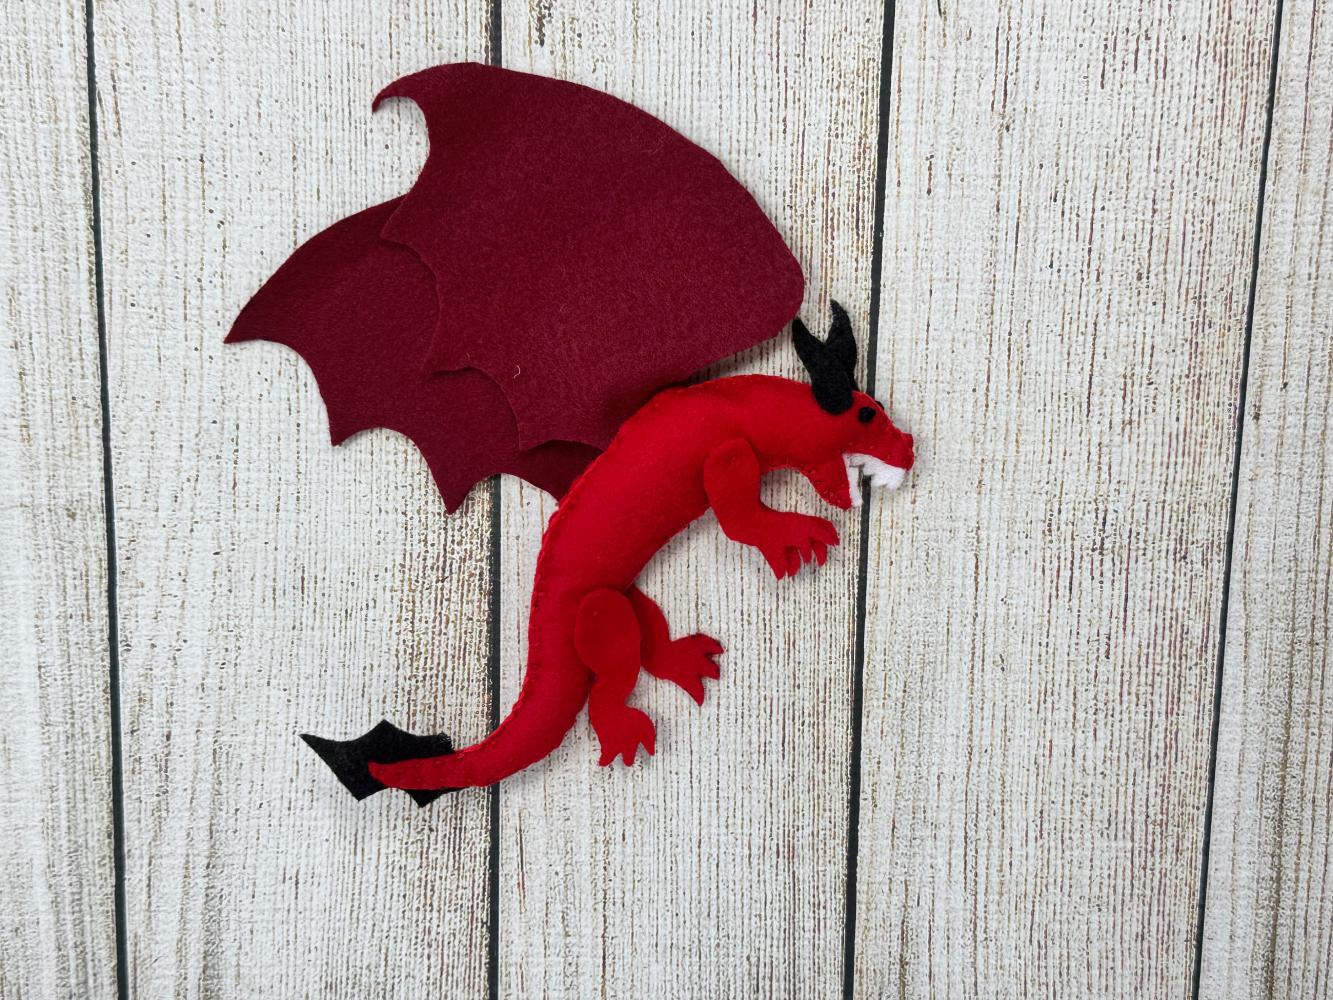
Your felt dragon is complete, but you can continue adding decorative details to give it even more personality.
- Embroider small lines or scales along the body.
- Add felt spots in a contrasting color.
- Stitch claws onto the feet.
- Add extra spikes along the back or tail.
- Decorate the wings with embroidery or felt shapes.
- Add a ribbon loop to turn a smaller dragon into an ornament.
- Sew several dragons in different colors to create a complete elemental dragon collection.
Because dragons are imaginary, you can change the pattern and details as much as you like. Give your dragon enormous wings, tiny horns, rainbow scales, long teeth, or a completely unexpected color combination.
Your Handmade Felt Dragon Is Complete!
And there you have it, your own felt dragon! This project makes a fun stuffed toy, bedroom decoration, handmade gift, fantasy-themed ornament, or simple sewing activity for older children and adults.
Make a single red fire dragon or create a whole collection of elemental creatures. A blue water dragon, leafy green earth dragon, white ice dragon, or purple magic dragon can all be made from the same basic pattern.
Most importantly, do not worry about making every stitch perfectly even. Small variations are part of what gives a handmade felt creature its charm and personality.
Ready for Another Project?
Explore more free felt patterns and beginner-friendly hand-sewing tutorials from Sly Sew Simple.
Beautiful projects can be made one simple stitch at a time.
