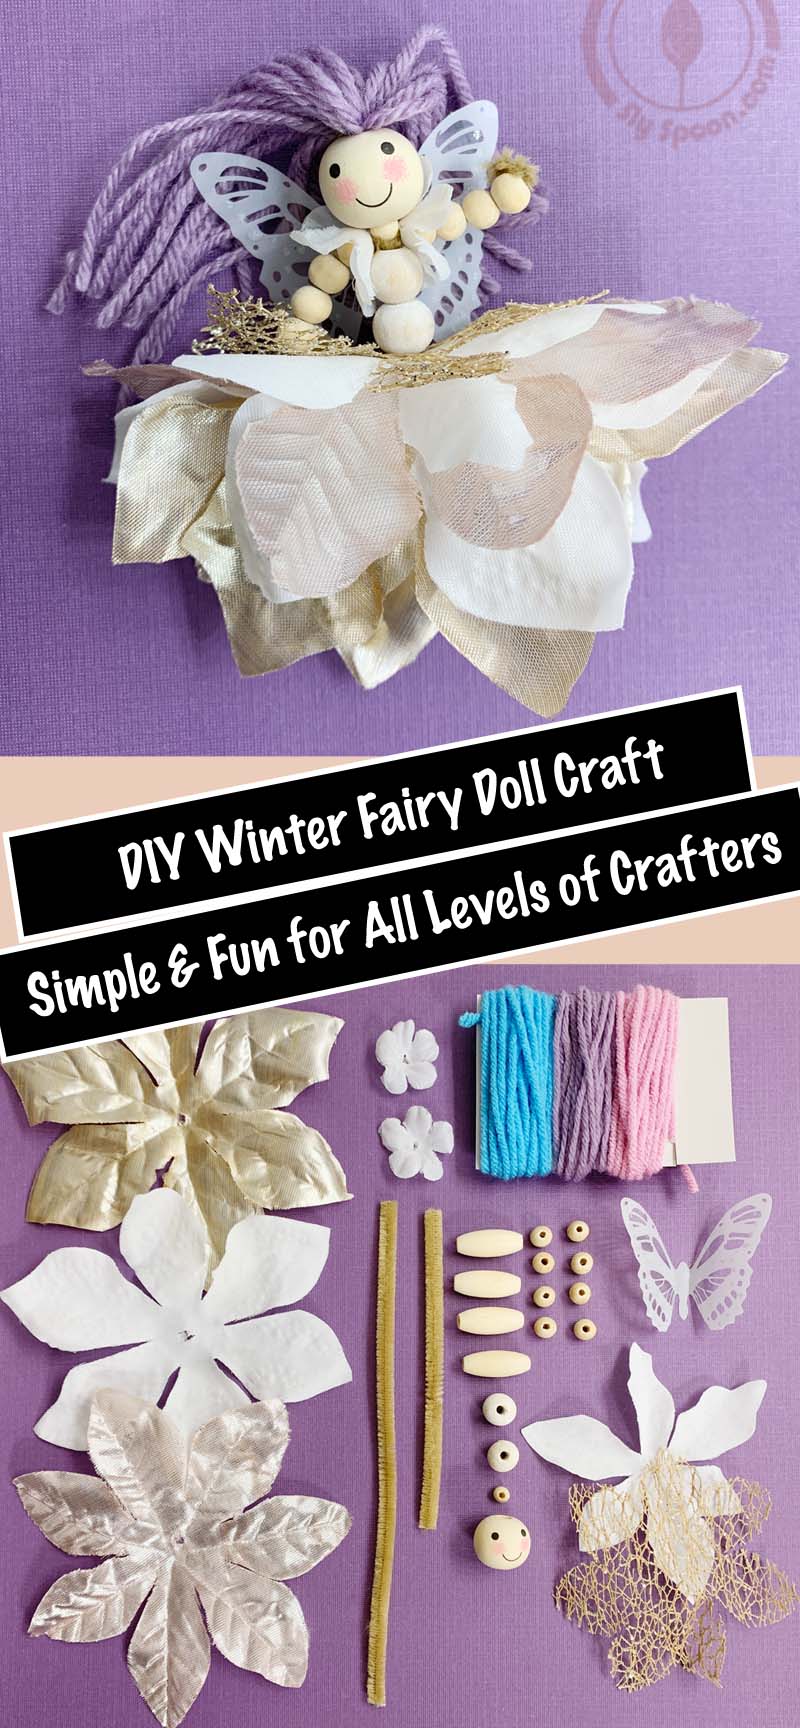
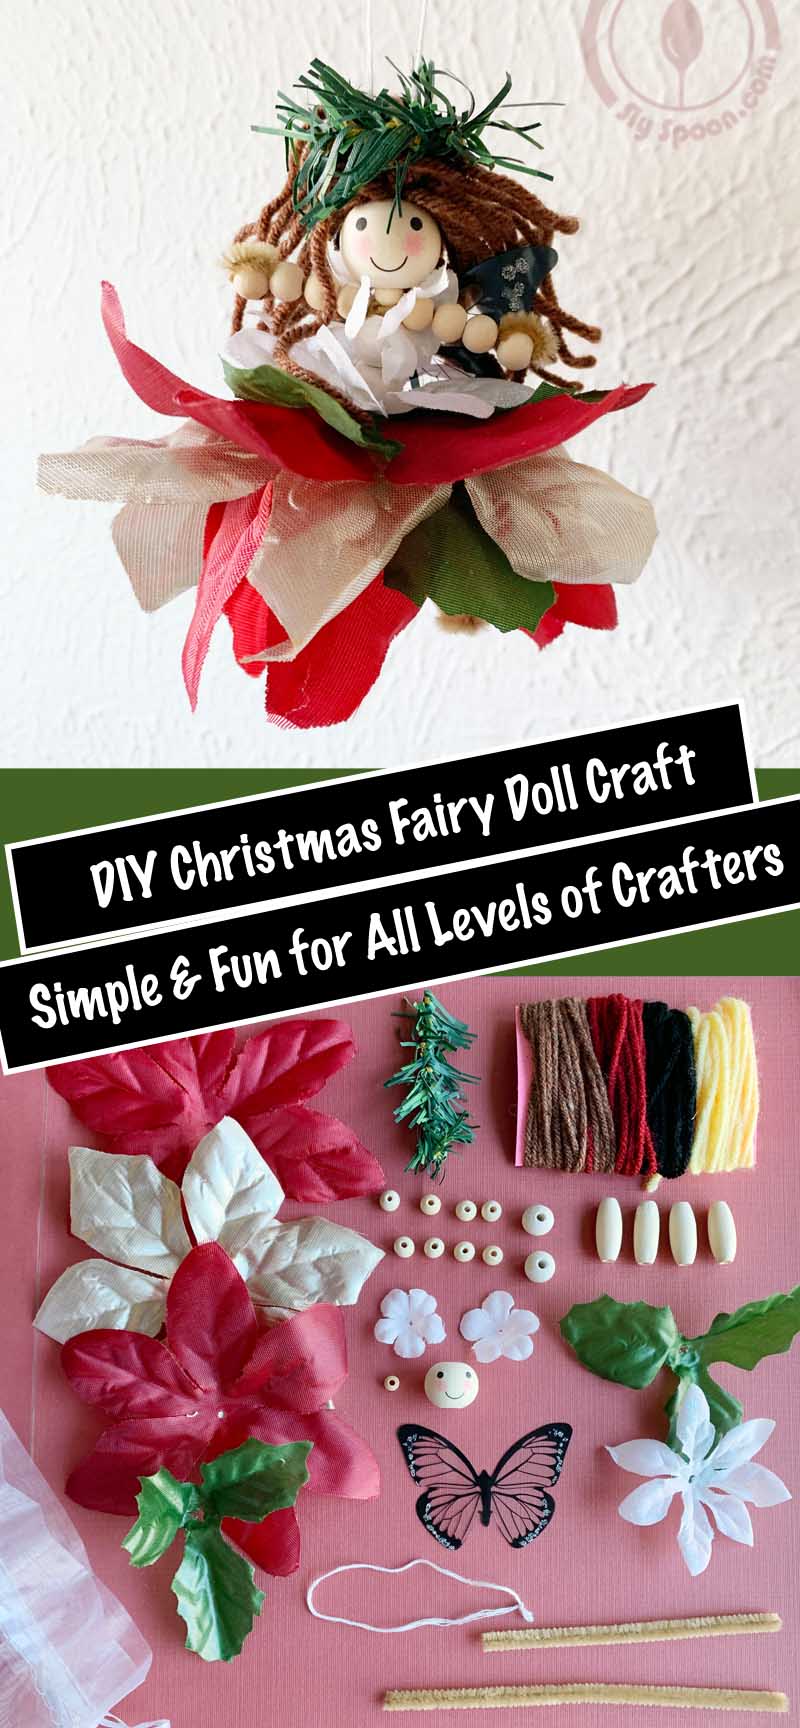
Hey there, craft enthusiasts! Are you ready for a delightful DIY project that will add some magical fairy flair to your life? Today, I’ll be sharing a step-by-step guide to creating your very own dazzling winter fairy doll. This craft is perfect for all ages and can be enjoyed throughout the year. Let’s get started!
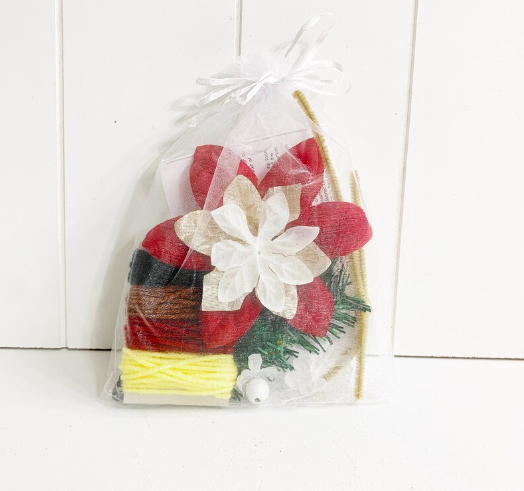
To begin, you’ll need a few key supplies. You can easily find all the materials you need on Amazon (linked below), or if you prefer the convenience of an all-in-one package, I’ve put together Christmas Fairy Doll Craft Kits in my Etsy shop.
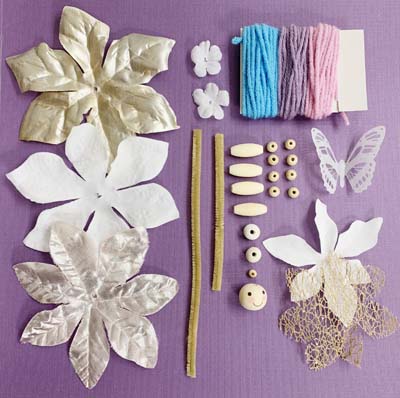
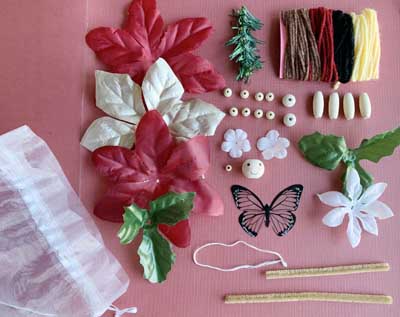
Supplies Needed:
(Links to products on Amazon below)
- Yarn (For Hair)
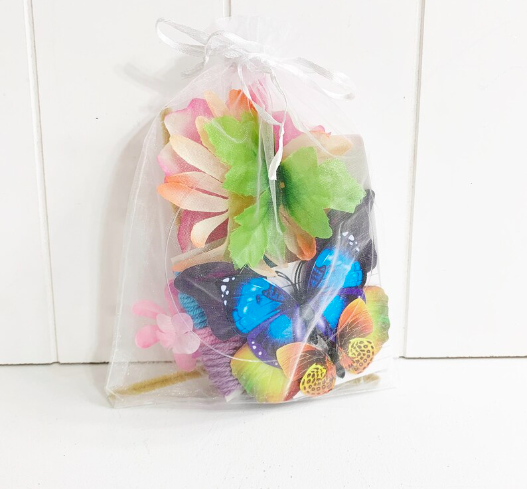
- Fabric Flowers and/or leaves (Various Sizes and Styles for skirt and two small ones for dress sleeves)
- 1 Set of Fairy Wings
- 2 pipe cleaners (Skin colored might work best?)
- Face/Head Bead (I used ones sized at 0.787″ (2 cm) diameter)
- 6MM beads (1 Needed)
- 8MM beads (8 Needed)
- 10MM beads (2 Needed – I colored mine, they are used for the dress part of the upper body)
- Spaghetti/Long Oval Beads (4 Needed)
- 1 Sticky Tab or Glue (to attach wings)
- Scissors
- String (if you want to make it into an ornament)
Or grab a ready-to-go kit with all these supplies from my PrintUnicorn Etsy Shop.
Instructions for making a Fairy Bead Doll:
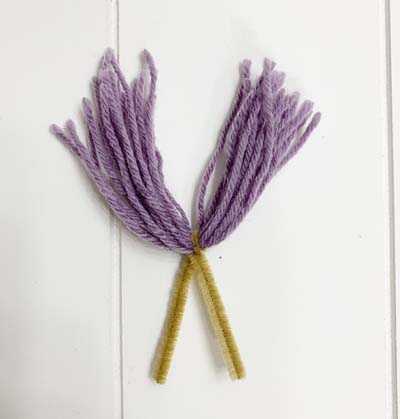
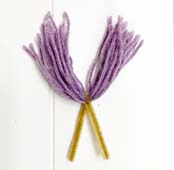
Step 1:
Pick your yarn hair color (or mix together a few). Take your chosen yarn color and wrap it around an index card or your fingers so the strands are about 3 inches long/or 6 inches when one side is cut. Wrapped it about 13 times (if you do too much more or if it’s too thick, it won’t fit into the bead head well). If you want a string to hang your fairy, add a hanging string to the yarn hair now. Then take a pipe cleaner and fold it in half to find the middle. Wrap the pipe cleaner securely around one end of the yarn (and hanging string) as close to the middle of your pipe cleaner as you can, then twist to secure it around the yarn hair. Take a pair of scissors and cut the yarn on the opposite side.
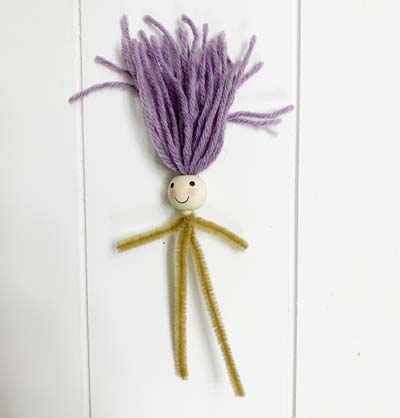
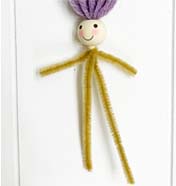
Step 2:
Take your yarn pipe cleaner and the bead with the face. Thread both ends of your pipe cleaners through the top of the doll’s head and pull the ends as tightly as you can out the bottom.
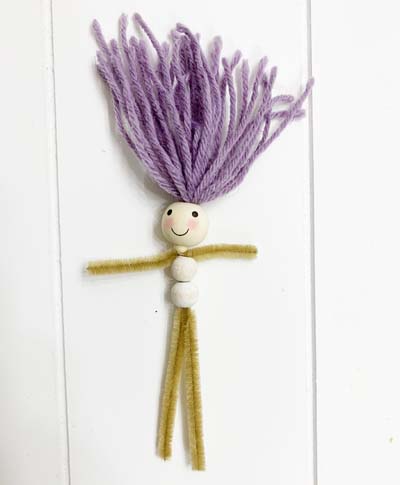
Step 3:
Get the smallest wood bead (6mm) and put both ends of the pipe cleaner through it to make the doll’s neck.
Step 4:
Take the second pipe cleaner and fold it in half. Then separate the two ends of the pipe cleaner under the doll’s neck and put the middle of the new pipe cleaner between them, then wrap the neck pipe cleaner/fairy arms to hold the leg pipe cleaner in place.
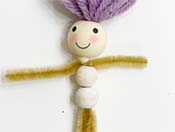
Step 5:
Take the two 10mm/colored beads and put both ends of the new/longer pipe cleaner through them and push them up until they are right under the neck.
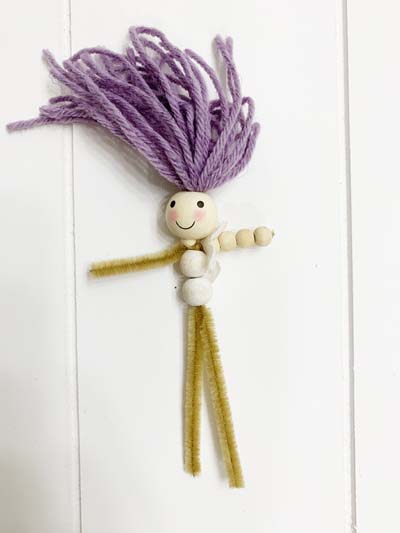
Step 6:
If you have them, take a tiny flower and put it on the arm pipe cleaners, then add four of the 8mm beads to create the arm. Fold the extra bit of pipe cleaner near the hand part around the last bead to hold it in place and trim off any extra. (Repeat those steps with the second arm.)
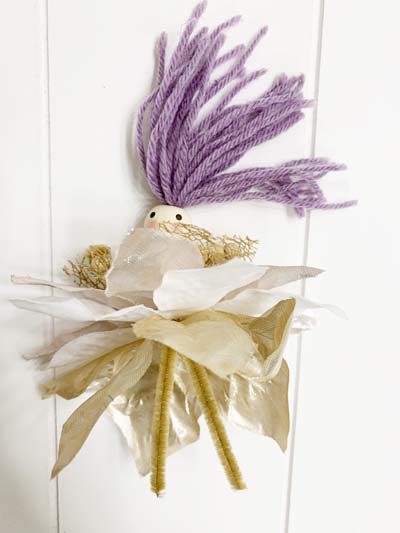
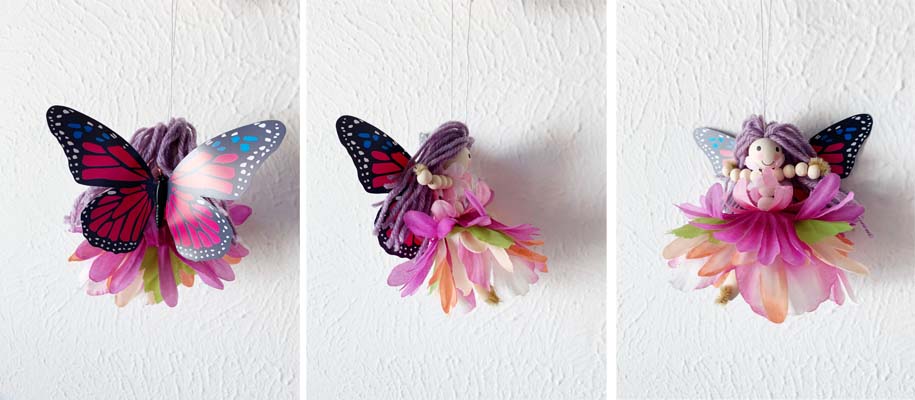
Step 7:
Take your larger flower petals and leaves and arrange them as you like. Starting with the smaller blooms, slide both ends of the leg pipe cleaner through them, and push the petals up until they are right under the stomach beads. Keep adding until you’ve placed all of your flower petals.

Step 8:
Separate the leg pipe cleaners and add two of the long beads to each leg, then bend the remaining bit of pipe cleaner into a circle/foot shape. Trim off any extra pipe cleaner.
Step 9:
Take the fairy/butterfly wings and bend them so they stick up/out and make a 3D shape. Cut the antenna off of the largest pair if you like. Then pull off one end of the sticky square included in the kit and stick it to the back of the wings, then pull off the other end and stick it to the top white bead on the fairy’s back.
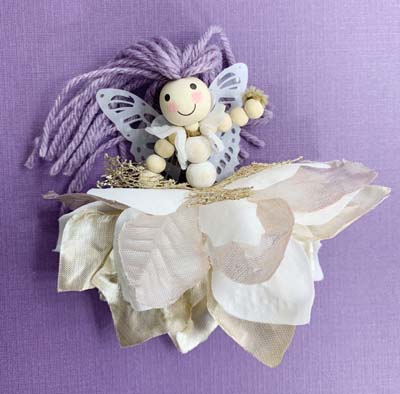
Step 10:
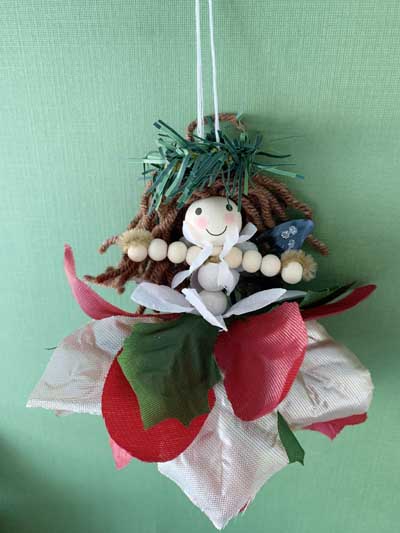
Enjoy your fairy!
Now that you’ve created your fairy bead doll masterpiece, find the perfect spot for it in your home or give it as a sweet handmade gift. These sweet magical fairies are so fun and unique and are sure to bring a smile to your face. So, grab your supplies, follow the steps, and make something magical. Happy crafting!