This post may contain affiliate links. Read our disclosure policy.

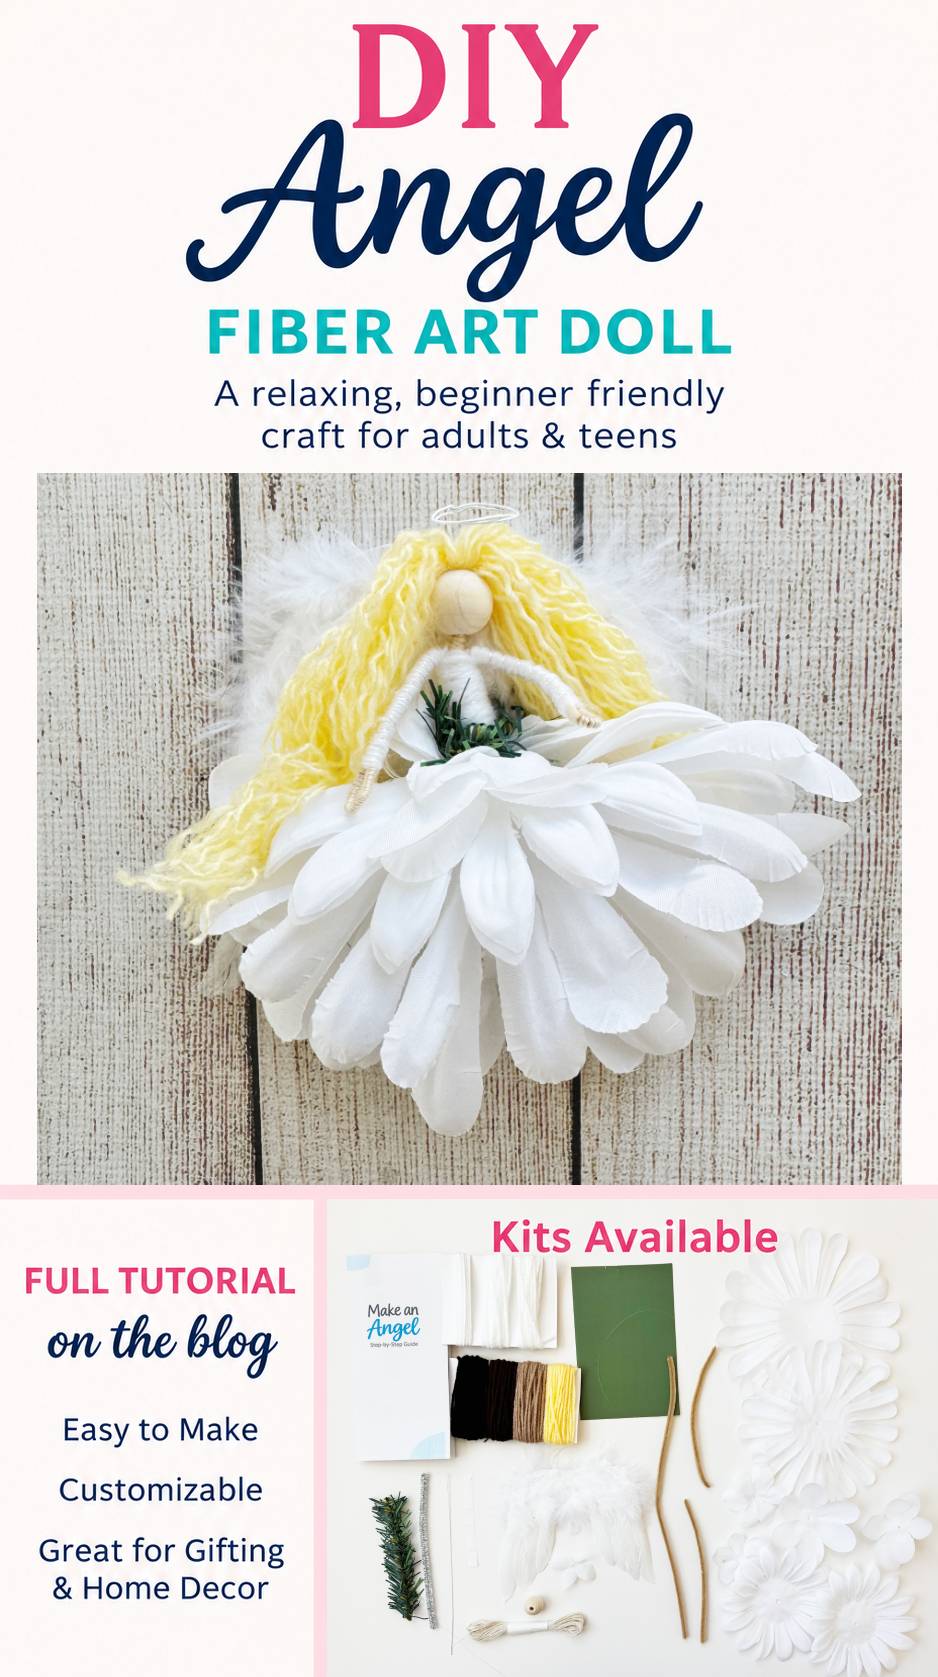
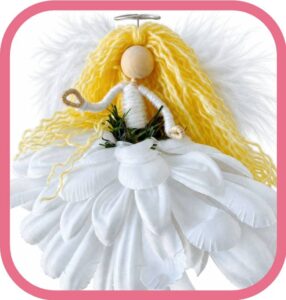
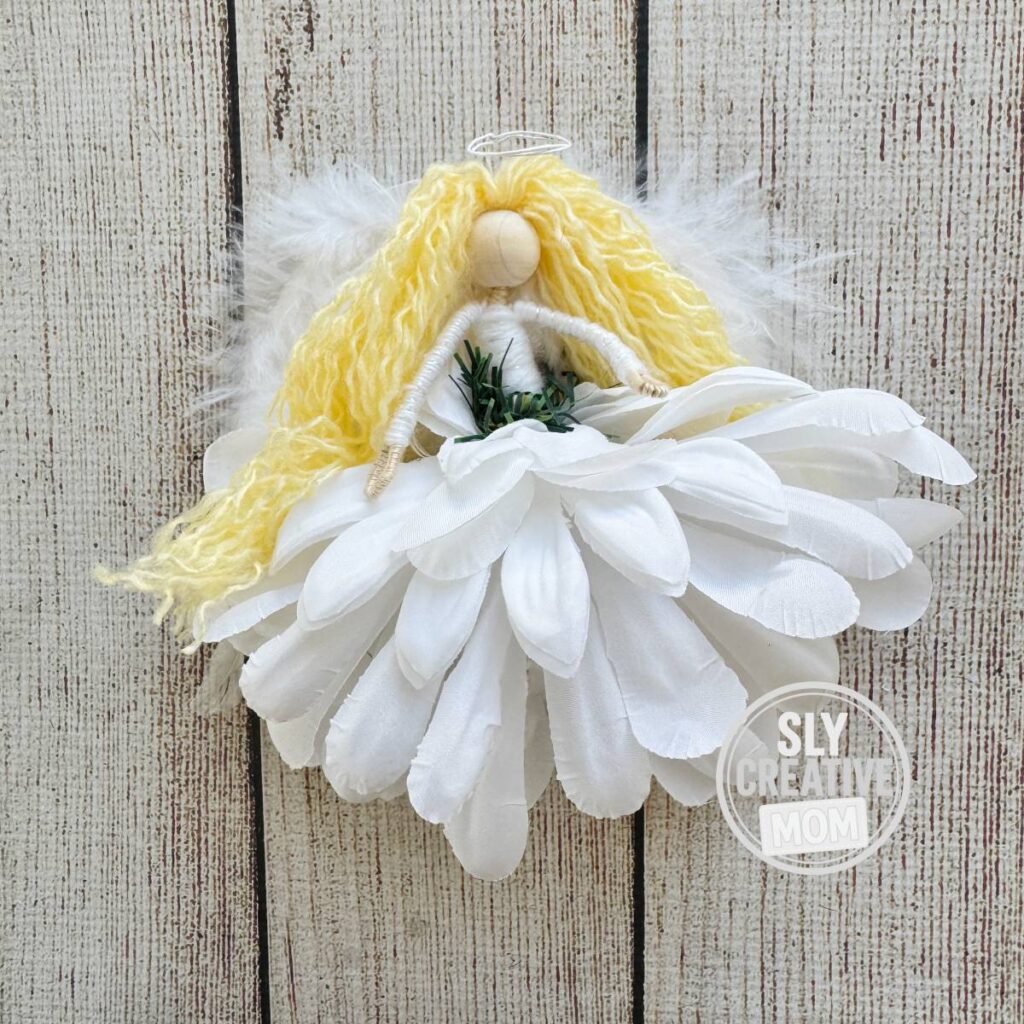
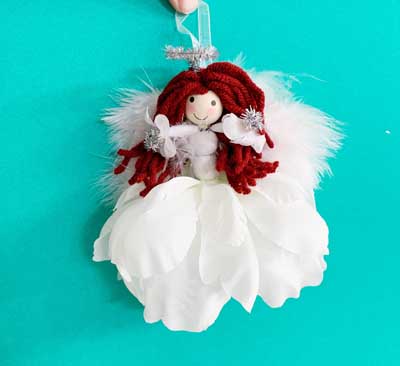
I’ve loved making my little flower fairies, and with Christmas coming, I wanted to give them a holiday spin. A white flowery dress, fluffy feather wings, and a tiny halo felt like the perfect way to switch it up.
This DIY Christmas angel craft uses yarn, pipe cleaners, a wooden bead, and fabric flowers to create an angel you can personalize. Give her long curls, a braid, or a little updo, then arrange her petal dress and finishing details however you like.
It’s a relaxing project for adults and teens, with plenty of room to experiment. There’s no sewing or hot glue required (sticky tabs or double sided tape work well for the craft), and the only tool you’ll need is scissors.
Hang your finished angel on your Christmas tree, tuck her into a holiday display, or make one as a handmade gift.
Supplies You’ll Need
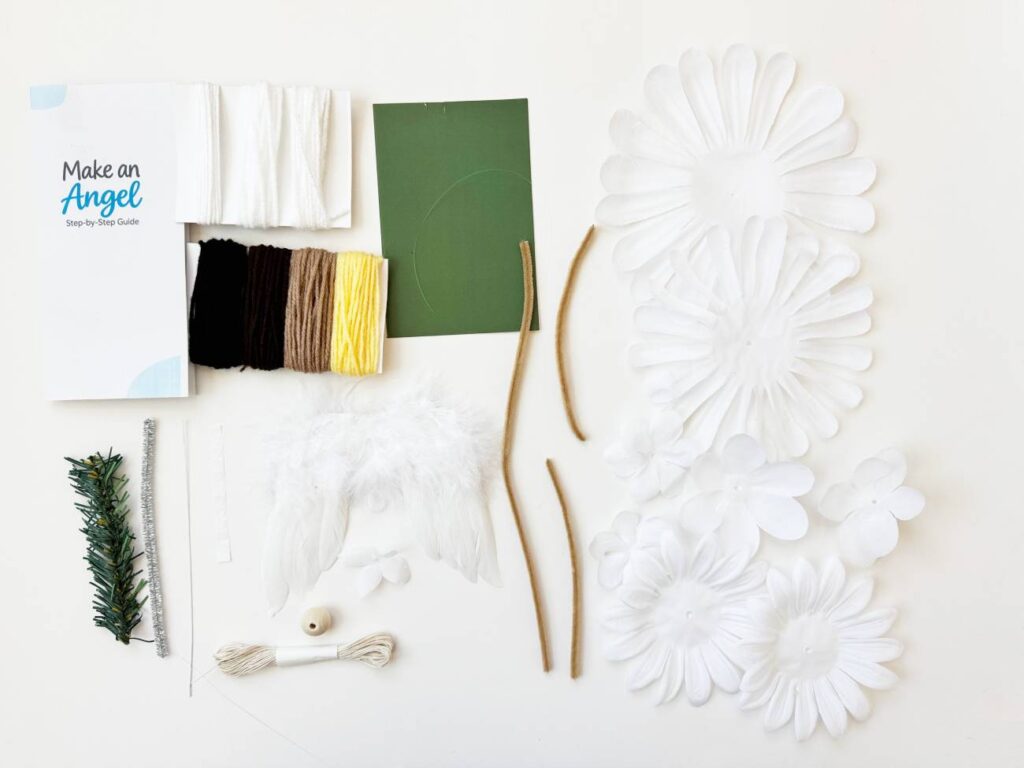
You can also gather your own materials to follow along.
- Wooden bead (20mm) For the head (I hand painted my tan and dark beads)
- Pipe cleaners (skin tone) One cut to 12″ or the body & 2 cut 6″ for the arms and torso
- Yarn for hair and shirt
- Embroidery floss (skin tone)
- Glue Dots (alternatively hot glue or double sided craft tape would also work)
- Scissors
- Measuring cards or cardboard – 6″
- Hanging string (optional)
- White fabric flowers in various sizes
- Feather wings
- Decorative wire or tinsel pipe cleaner for a halo
- Green vine wire or other embellishments, optional
Want Your Supplies Ready to Go?
I put together DIY Angel Craft Kits in my Etsy shop with the supplies for making one angel, including illustrated instructions.
➜ Shop Adult Fiber Art Angel Kits
Watch the Full Angel Video Tutorial
If you’d like to see how the wrapping and assembly work, follow along with my full video tutorial. You can pause whenever you need a little extra crafting time.
[COMMING SOON]
How to Make Your Christmas Angel
 Step 1 — Make the Yarn Hair Bundle
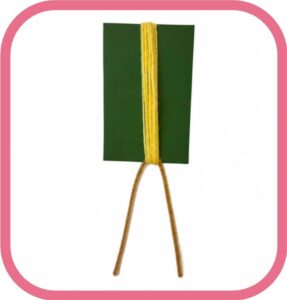
Choose your yarn color and wrap the yarn around the long side of the 6″ cardboard card about 12 times. (Too much yarn will be hard to fit in the bead head.) You can use a larger card if you’d like your angel to have extra-long hair.
If you want your angel to hang, tie a knot in your hanging string (I used fishing line) and add it to the hair bundle now.
Find the middle of the 12″ pipe cleaner. Place it across one end of the yarn (and hanging string, if used), twist it in the middle tightly to secure it around the hair. Cut the yarn on the opposite side to free the strands.
Tip: Avoid using too much yarn. All of that hair needs to fit inside the opening of the wooden bead. You can always remove a few strands if your bundle is too thick.
Step 2 — Create the Curly Hair
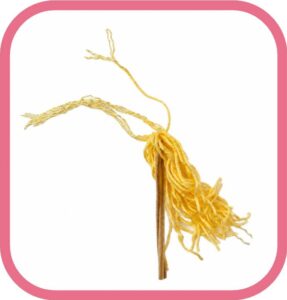
This step is optional, but it’s what gives these angels their wonderfully fluffy, textured hair.
Take one strand of yarn and gently untwist it until you can see the smaller strands that make up the yarn. Pull those individual strands apart.
Repeat with the remaining yarn.
Different yarns behave differently when they’re separated. Acrylic yarn tends to create especially fluffy curls, while other yarns may produce softer waves.
You can also leave the yarn intact, braid sections, or combine textures to create your own hairstyle.
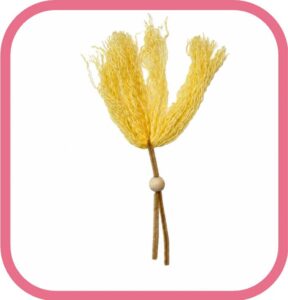
Step 3 — Add the Wooden Bead Head
Insert both ends of the pipe cleaner through the wooden bead.
Slide the bead upward until the hair sits securely inside the bead opening.
If you’ve used too much hair and the bead won’t slide into place, remove a few yarn strands and try again.
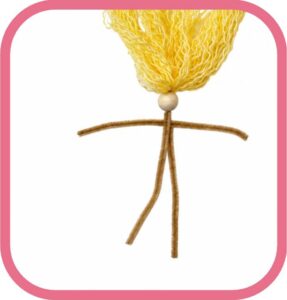 Step 4 — Add the Arms
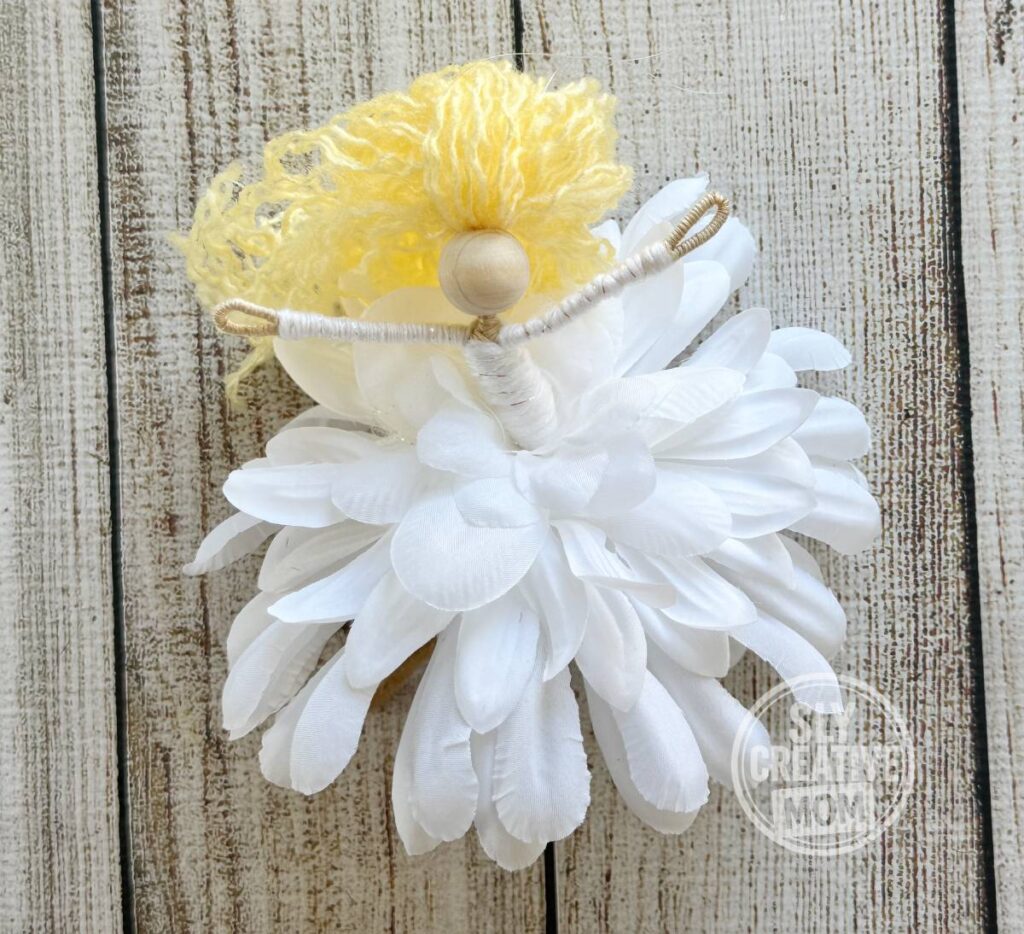
Fold one 6-inch pipe cleaner in half to find its center, then open it back out.
Slide it between the two body stems just below the wooden bead. Center it so the arms are the same length, leaving a short space under the head bead for the neck.
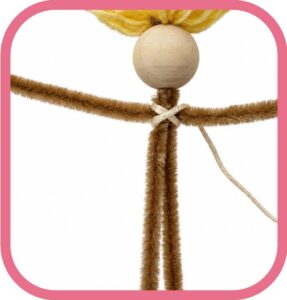 Step 5 — Wrap the Neck, Arms, and Hands
Place a sticky tab or some hot glue on the back of the angel’s near the neck. Press one end of the skin colored embroidery floss onto the sticky tab. Slowly wrap the embroidery floss around the pipe cleaners in an “x” shape to secure the arms in place, then wrap up the neck, (wrap tightly so no fuzzy pipe cleaner shows through.)
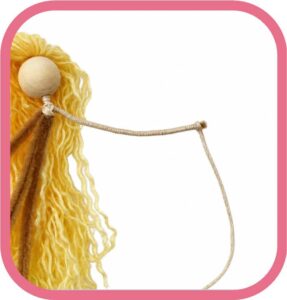
Arms and Hands: Next, pick an arm and continue wrapping almost to the end of the pipe cleaner. Leave about 1/8 inch at the end unwrapped. Bend the pipe cleaner tip into a small loop to create the hand.
Continue wrapping to cover the end of the hand completely, then return to the body center and repeat on the second arm.
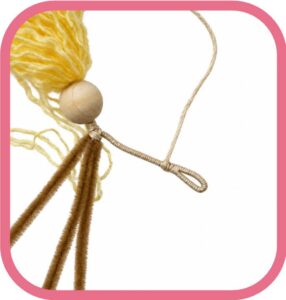 Continue wrapping back toward your “x” until all visible pipe cleaner on the arms is covered. Add a second sticky tab on the back to secure the floss before trimming the excess.
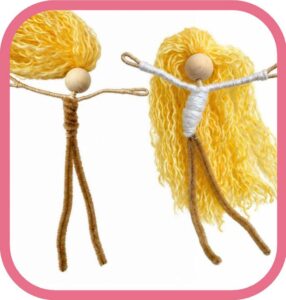 Step 6 — Shape the Torso and Make the Shirt
Start by giving your angel’s torso some shape. Take the second 6″ pipe cleaner, and wrap it around your angel’s torso, if you want your angel to have a bigger chest, hips or stomach, wrap the pipe cleaner in wider circles in those areas.
When you’re finished pick a strand of white yarn and measure out about 24″. Like you did with the hair, twist the yarn counter clockwise until you see 4 stands and carefully pull out one of the stands. Get a sticky tab and place it on the back of the angel and use your new single stand of yarn to wrap over the torso, covering all the fluffy bits of the pipe cleaner and creating a shirt for your angel. Add sleeves, or other embellishments if you like
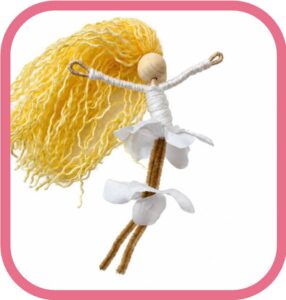 Step 7 — Build the Flower Petal Skirt
Arrange your flower layers in the order you want to use them. I start with the smaller layers near the waist and add larger ones underneath.
Slide both unwrapped body/leg stems through the center of each flower layer, then push the petals up beneath the torso.
Keep adding layers until you’re happy with the shape of the dress. Rotate the layers so the petals fill the spaces between one another.
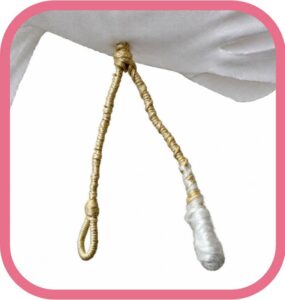 Step 8 — Wrap the Legs and Form the Feet
Place a sticky tab on the back bottom of the angel. Press one end of the skin colored embroidery floss onto the sticky tab to secure it. Slowly wrap the embroidery floss around the pipe cleaner legs the same way that you did for the arms. Continue wrapping down the legs until all visible pipe cleaner is covered. Add a second sticky tab near the fairy’s bottom to secure the floss before trimming the excess.
 Step 9 — Attach the Feather Wings
Take the set of wings and gently push the feathers at the top aside until you can see the firm (cardboard) backing at the center of the wings.
Place a sticky tab on that backing, then press it firmly against the back of the wooden head. The sticky taps sticks much better to the bead than it does to the yarn that makes up the angels shirt.
Arrange the hair around the wings and gently fluff any feathers that became tucked underneath.
Step 10 — Add the Halo and Finishing Details
Shape a piece of decorative wire into a small circle, leaving a straight end beneath it. Insert that end into the top opening of the bead to position the halo above the hair.
Now add your finishing touches!
- Wrap green vine wire around the waist for a christmas belt.
- Braid a section of hair or tie it into an updo.
- Adjust the arms into a pose you like.
- Rearrange the petals to show off their different shapes.
- Add a small bow or another embellishment.
- Make shoes out of wrapped yarn
Ways to Display Your Handmade Angel
Use the hanging loop to add your angel to your Christmas tree, a wreath, or a garland. She also makes a lovely addition to a mantel display or a wrapped gift. If you’d like to use her as a topper for a small tree, check her size against your tree and secure her in place with a suitable tie or support.
I love seeing how much personality comes from a different hairstyle, a few carefully arranged petals, or a small change in pose.
If you make your own Christmas angel, I’d love to hear how you styled her. And if you’d like the materials gathered and ready for you, you can find my angel kits in my Etsy shop.
➜ Shop Adult Fiber Art Angel Kits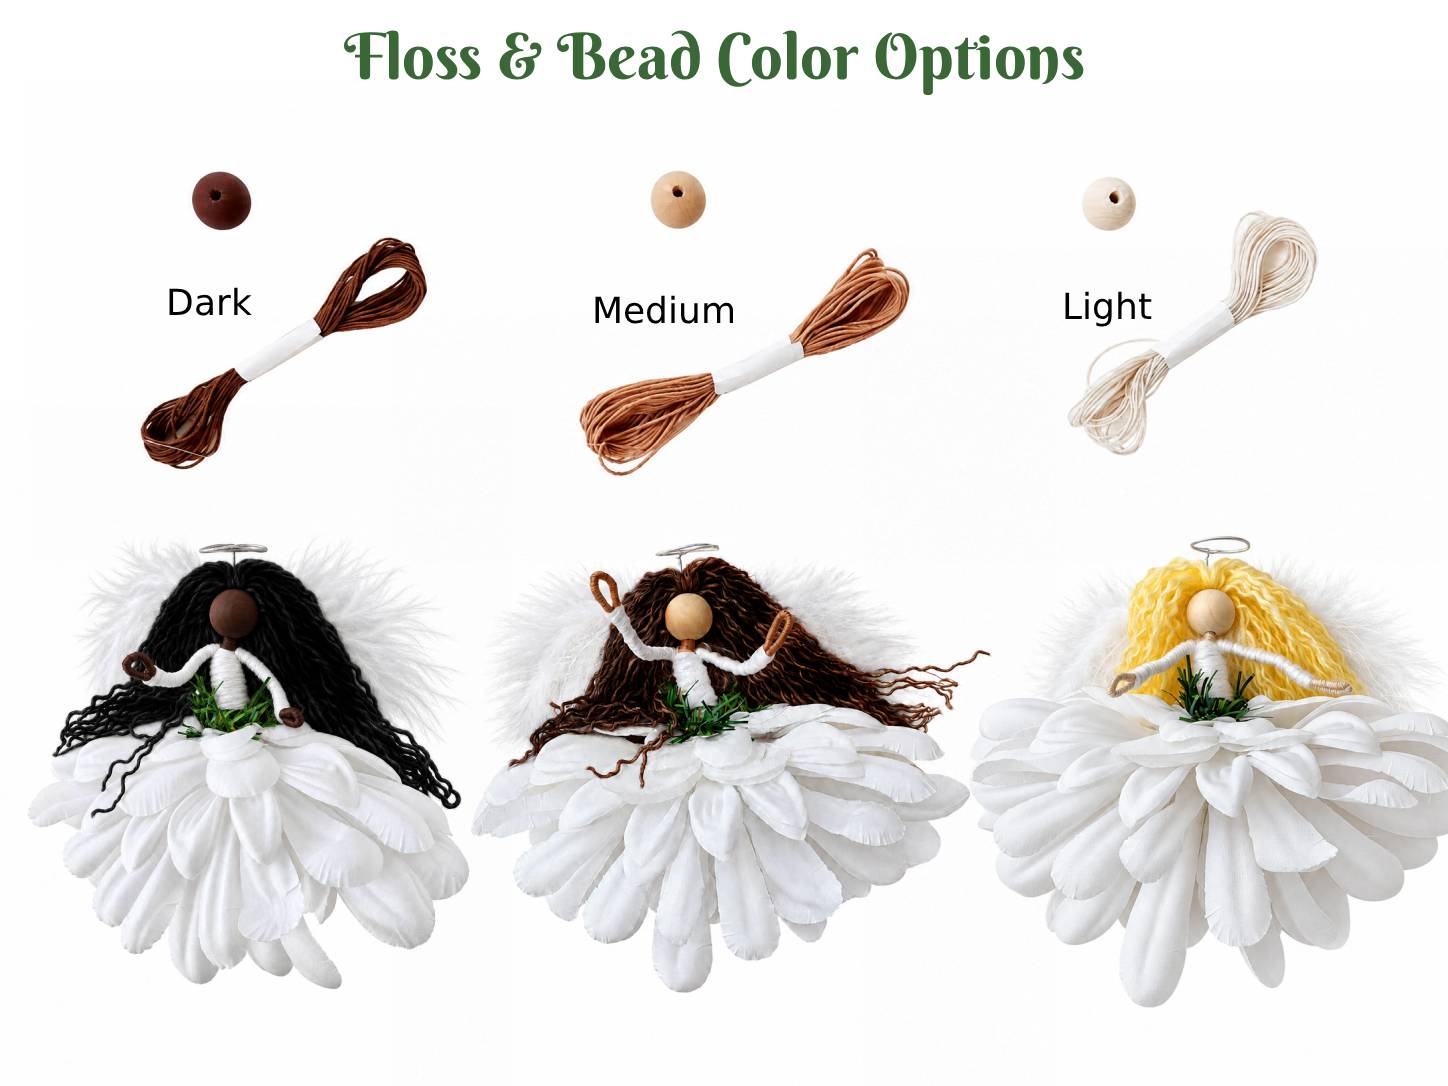 Happy crafting!
More Doll Crafts to Make
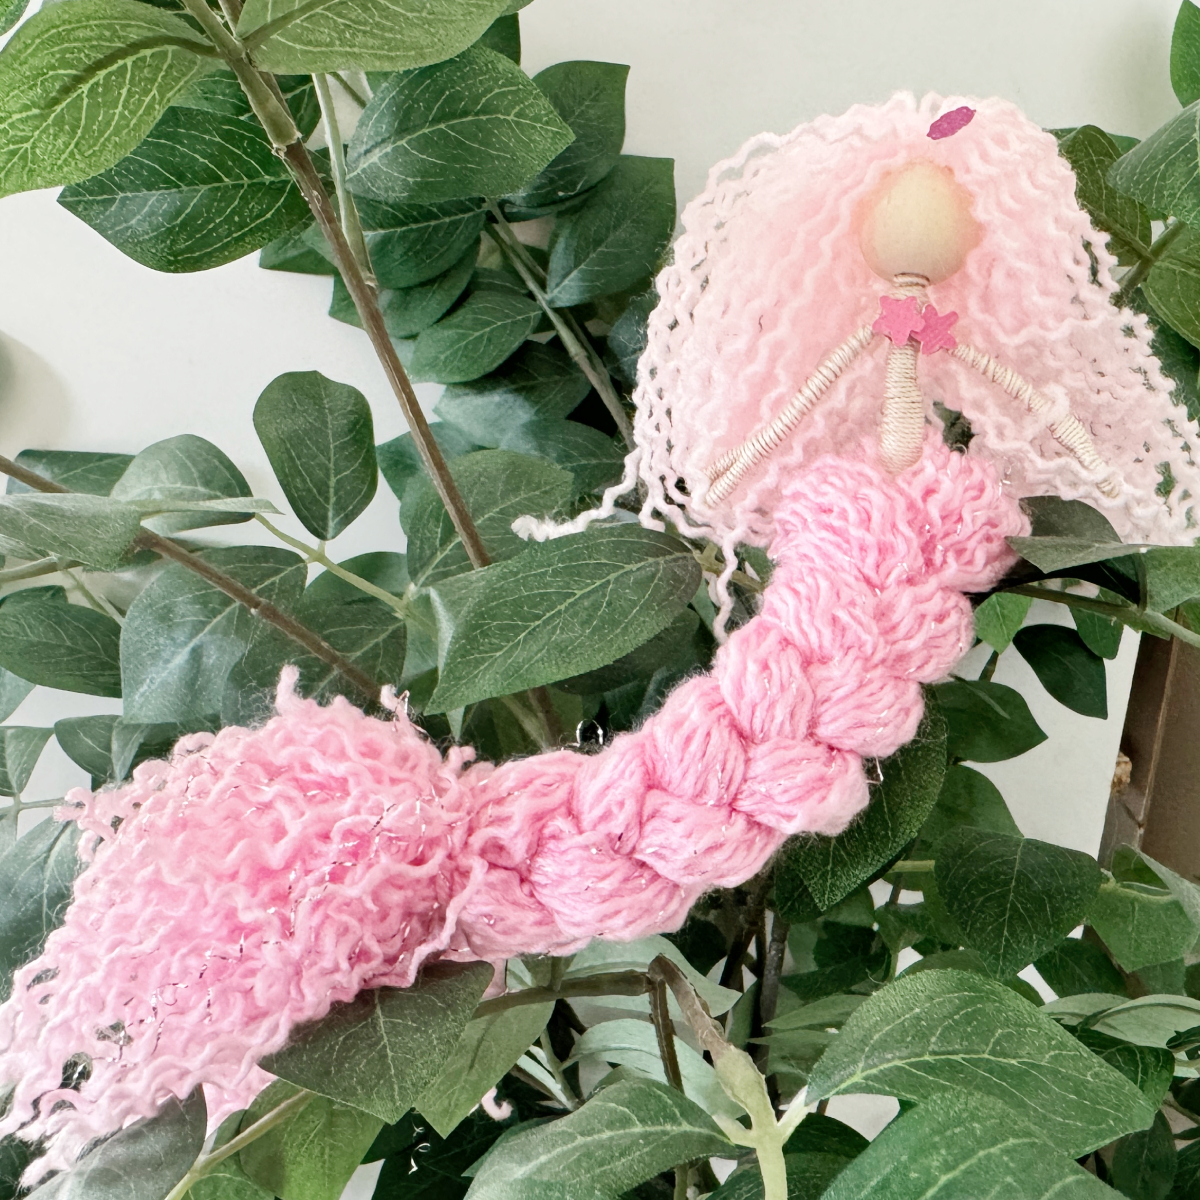
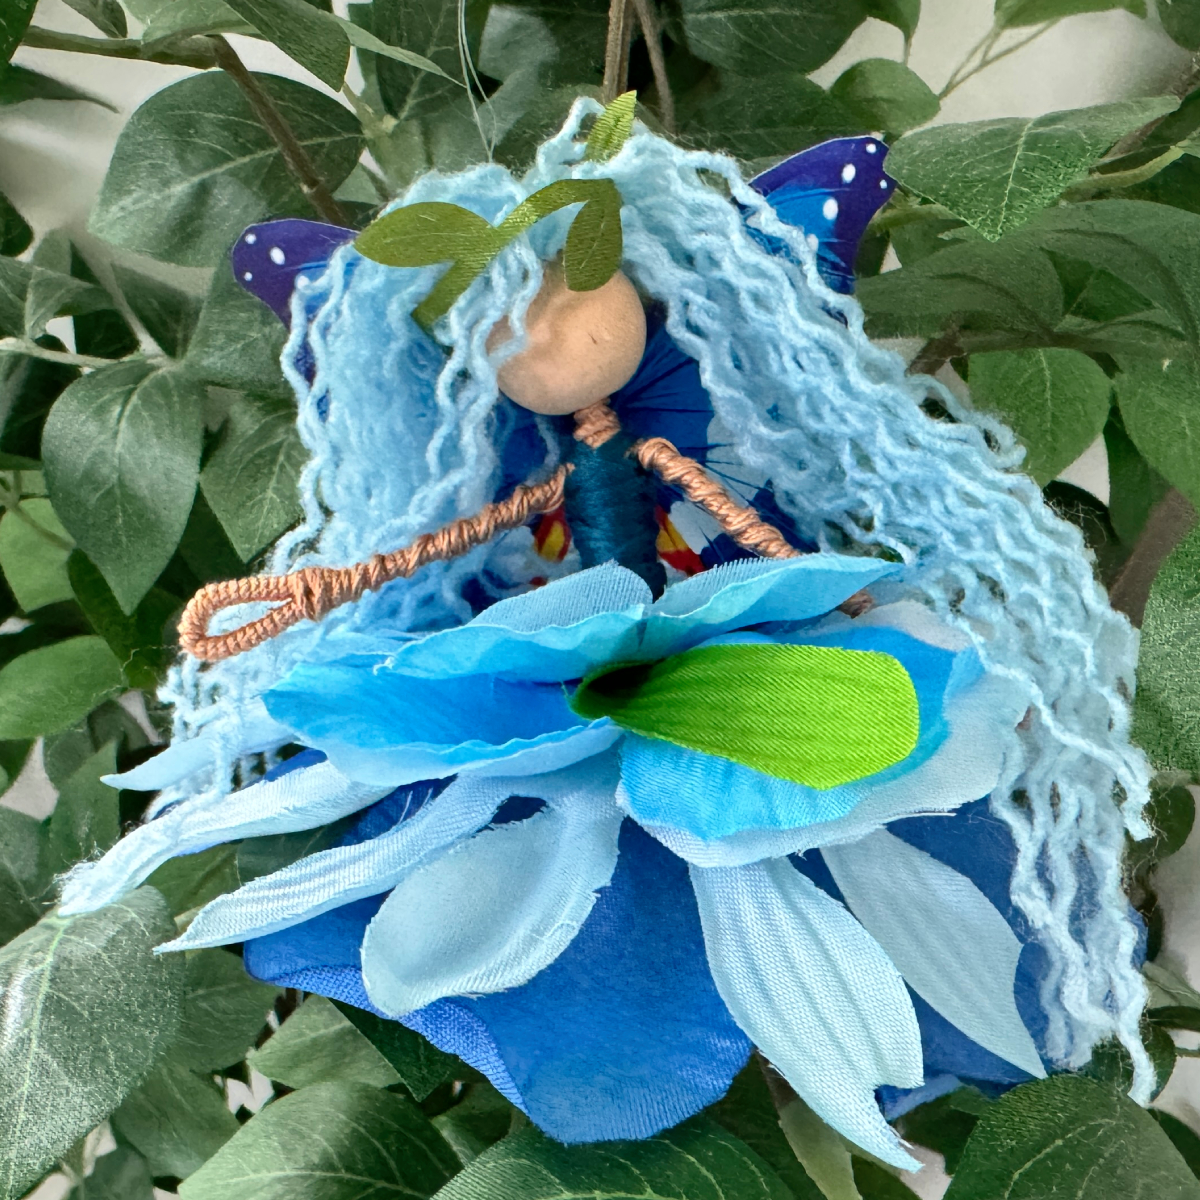
If you enjoyed building this angel, try my flower fairy or fiber art mermaid projects next. Each one gives you another way to play with yarn, colors, and make something adorable.

Looking for the Kids Version?
If you’re crafting with younger children, you might also enjoy my Kids DIY Angel.
It’s designed with younger hands in mind but still creates an adorable finished fairy, making it a great companion project if siblings, parents, or grandparents all want to craft together. (Great for age 4+)
More DIY Craft Kits to Try
If you enjoyed making this doll, I have several other DIY kits and tutorials that use the same idea: Simple crafts that look and feel impressive.
DIY Adult Fiber Art Mermaid
If you like the construction of this Angel, you’ll probably love my Adult Fiber Art Mermaids and Fairies.
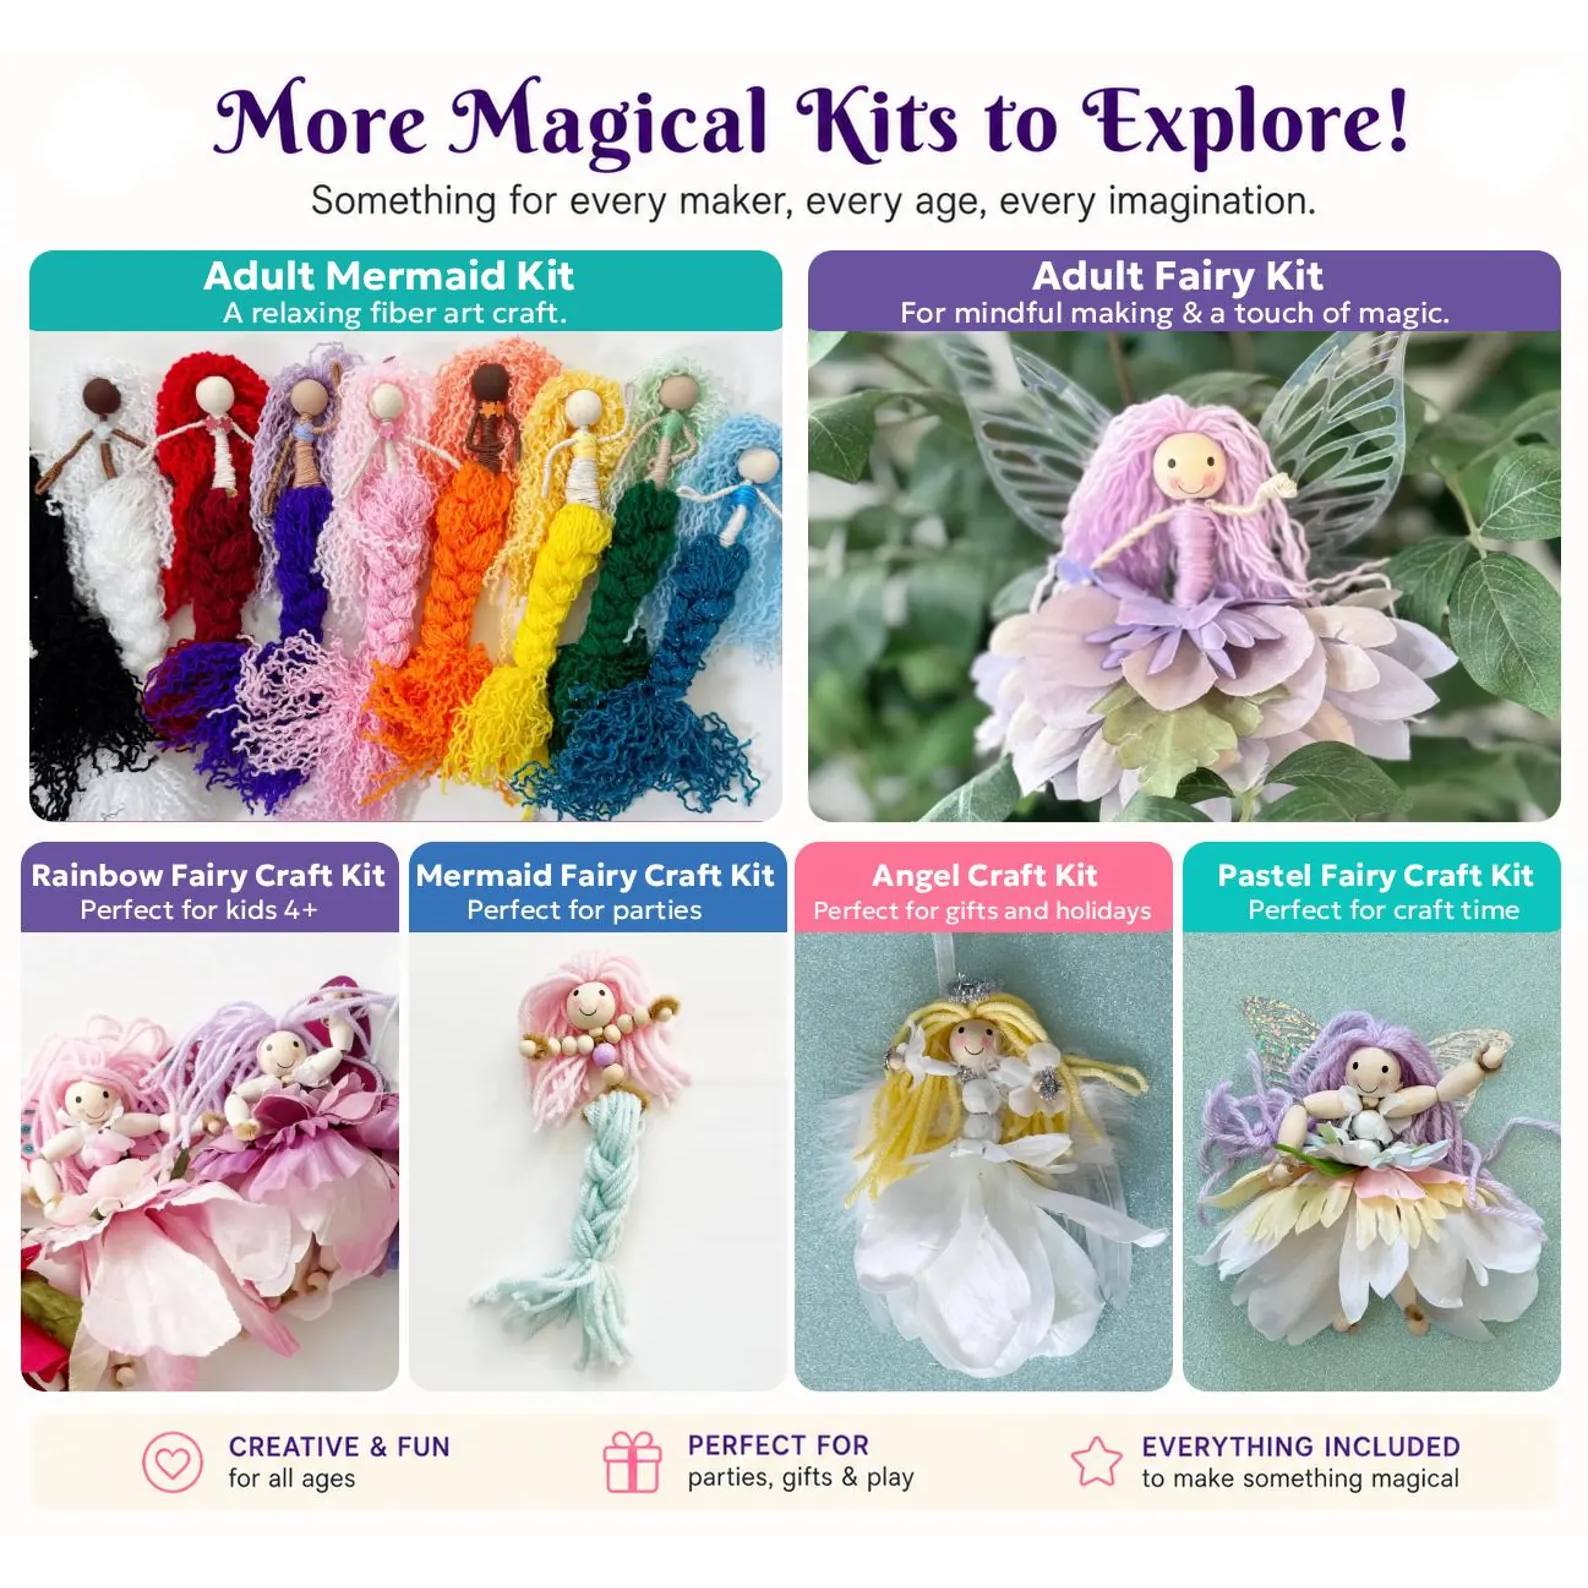
➜ Make the Adult Fiber Art Mermaid (Tutorial on blog)
DIY Fairy Kit for Kids
A simpler version of the fairy project designed for younger makers.
➜ Make the Kids Fairy (Tutorial on blog)
DIY Mermaid Kit for Kids
My kid-friendly mermaid uses beads and simple wrapping techniques, making it a fun companion to the more detailed adult fiber-art version.
➜ Make the Kids Mermaid (Tutorial on blog)
Shop All My DIY Craft Kits
If you’d rather have the materials measured, coordinated and ready to go, you can also browse all of my current DIY craft kits in my Etsy shop.
➜ Shop All DIY Craft Kits on Etsy
